Entry Editor is one of RebelMouse’s most powerful features. It’s designed to give content creators the powerful publishing tools they need to move the needle on the metrics that matter most. Here’s everything you need to know about Entry Editor’s Advanced Settings.
To access Advanced Settings, click the gear icon in the right-hand navigation menu of Entry Editor:
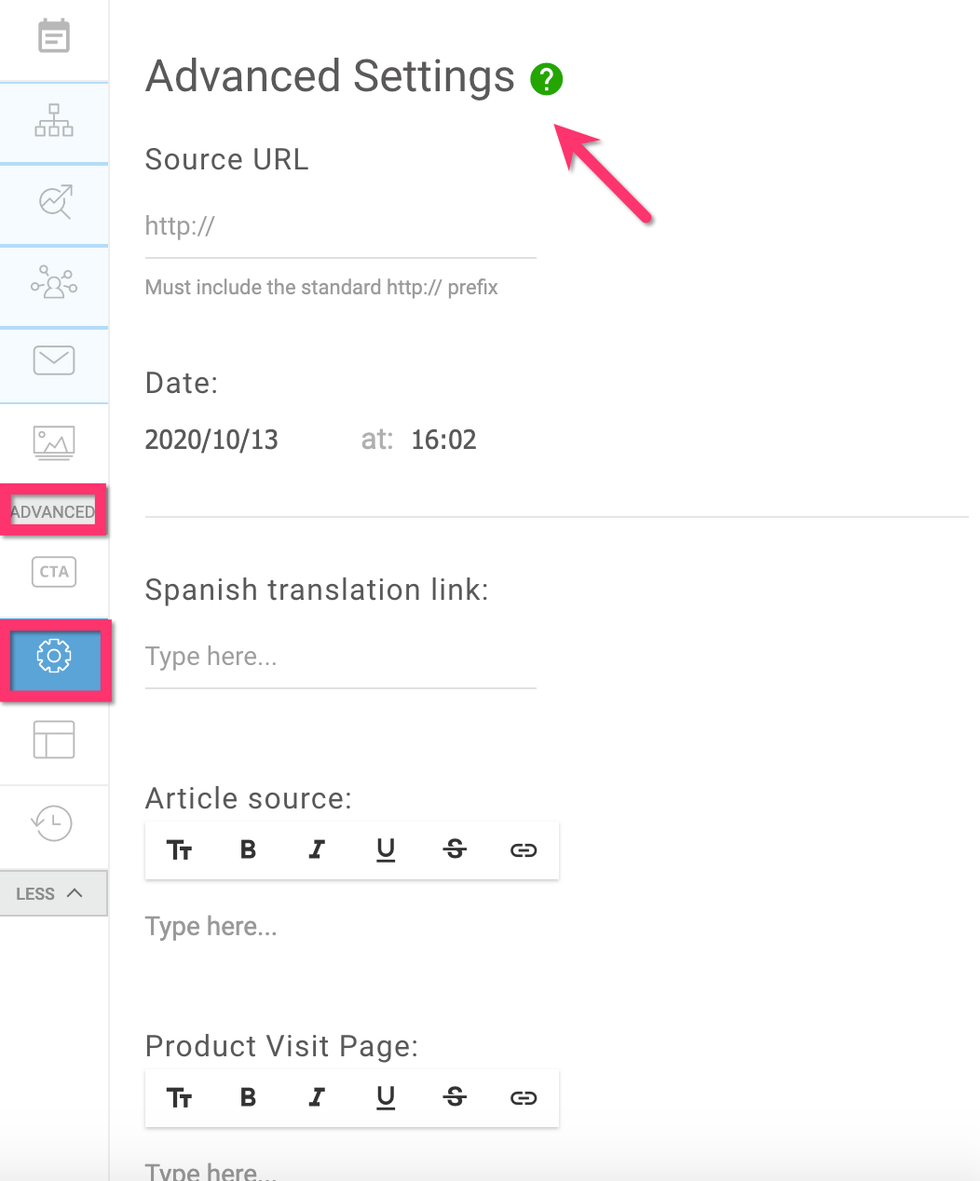
This menu provides a number of different functionalities. Here’s how each one functions, along with more about how you can use them:
Source URL
The Source URL field allows you to enter a different URL to redirect users to when they click on the post.
For example, if you have a post about team updates in 2021, but want anyone who tries to click on the post to be automatically redirected to another post with the team updates for 2022, you can enter the destination URL into the Source URL field. Be sure that the full URL is entered, and tick the checkbox next to Link Out Directly to the Original Source to ensure that users are automatically redirected to the new URL.
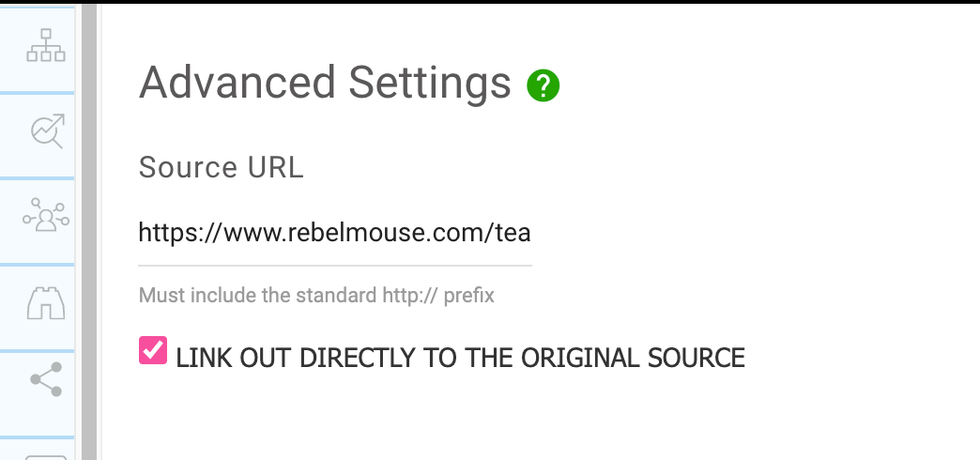
The Source URL field can also be used to direct users to a third-party website. For example, RebelMouse-powered Environmental Health News has a “From the Web” feature on their site. The stories featured in this section are displayed on their site normally, but redirect to the third-party site’s source URL when clicked. Here’s a GIF of what that experience looks like:

Embargo
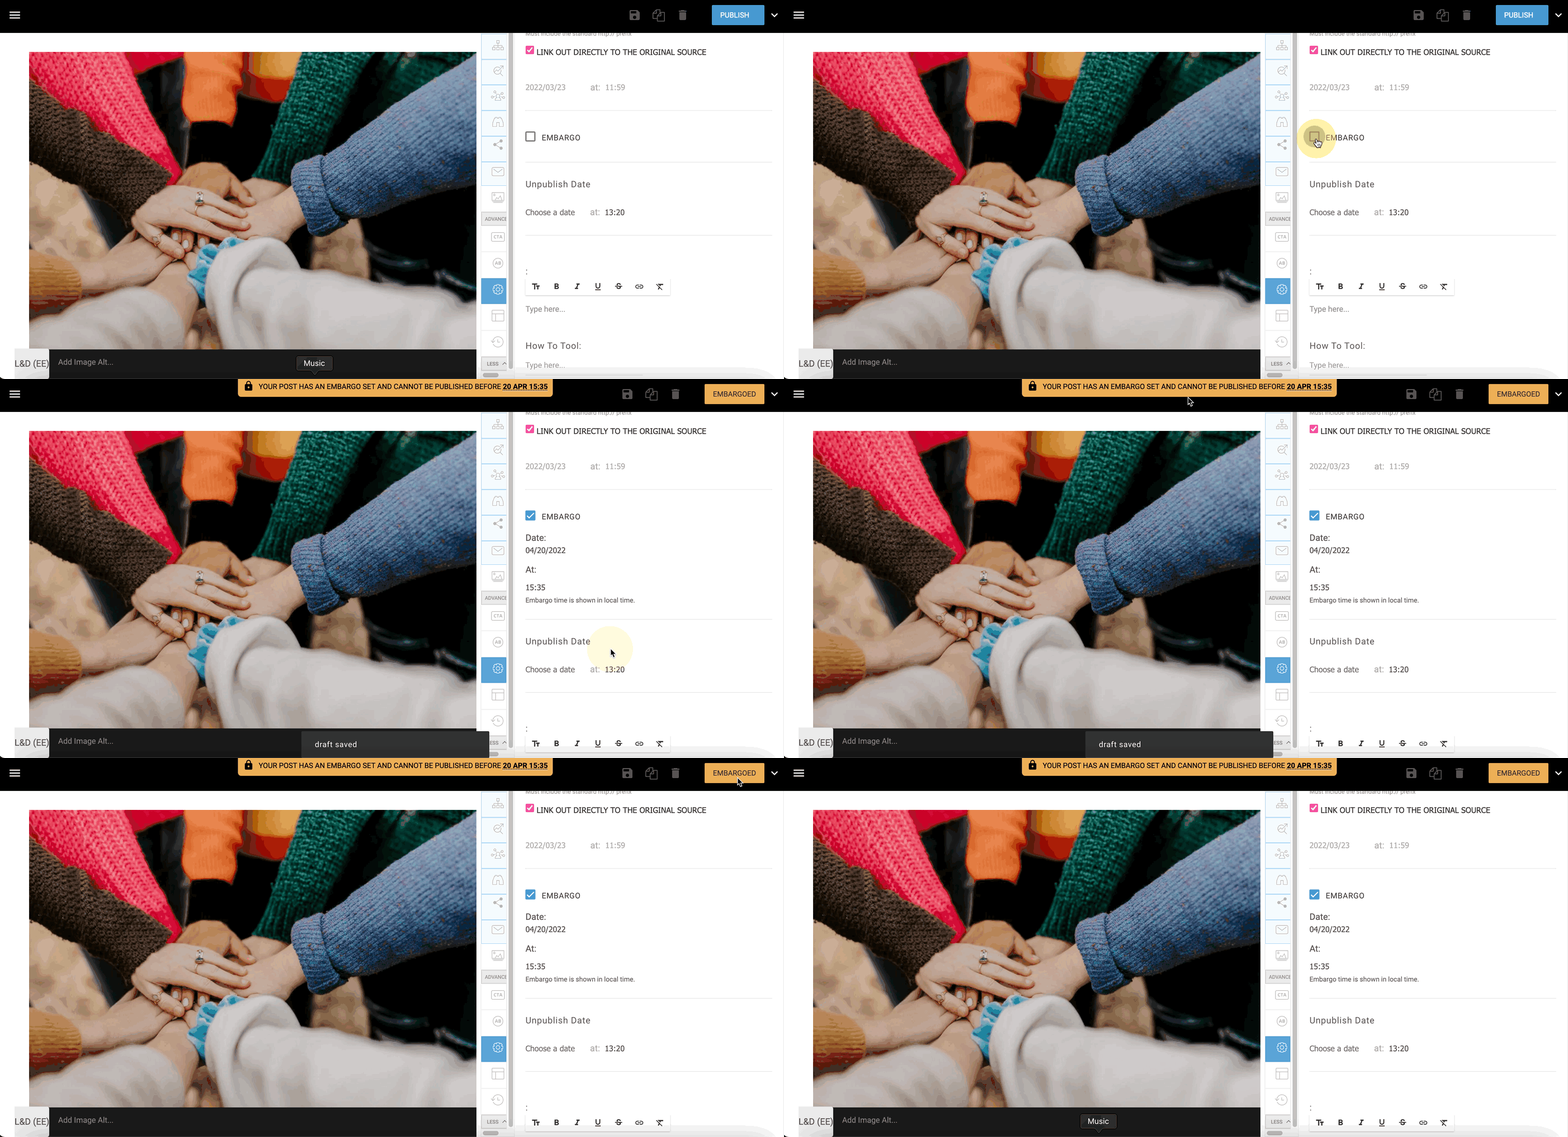
The embargo setting prevents an article from being published until a specific date and time. To set an embargo date, tick the checkbox next to Embargo . Then, use the calendar to set an embargo date and time. Once set, you will see a banner at the top of the post that indicates it has been embargoed. When you are done editing, click the Embargoed button in the top-right corner to save your changes. Here’s a GIF of that experience:
Click here to learn more about our embargo feature.
Unpublish Date
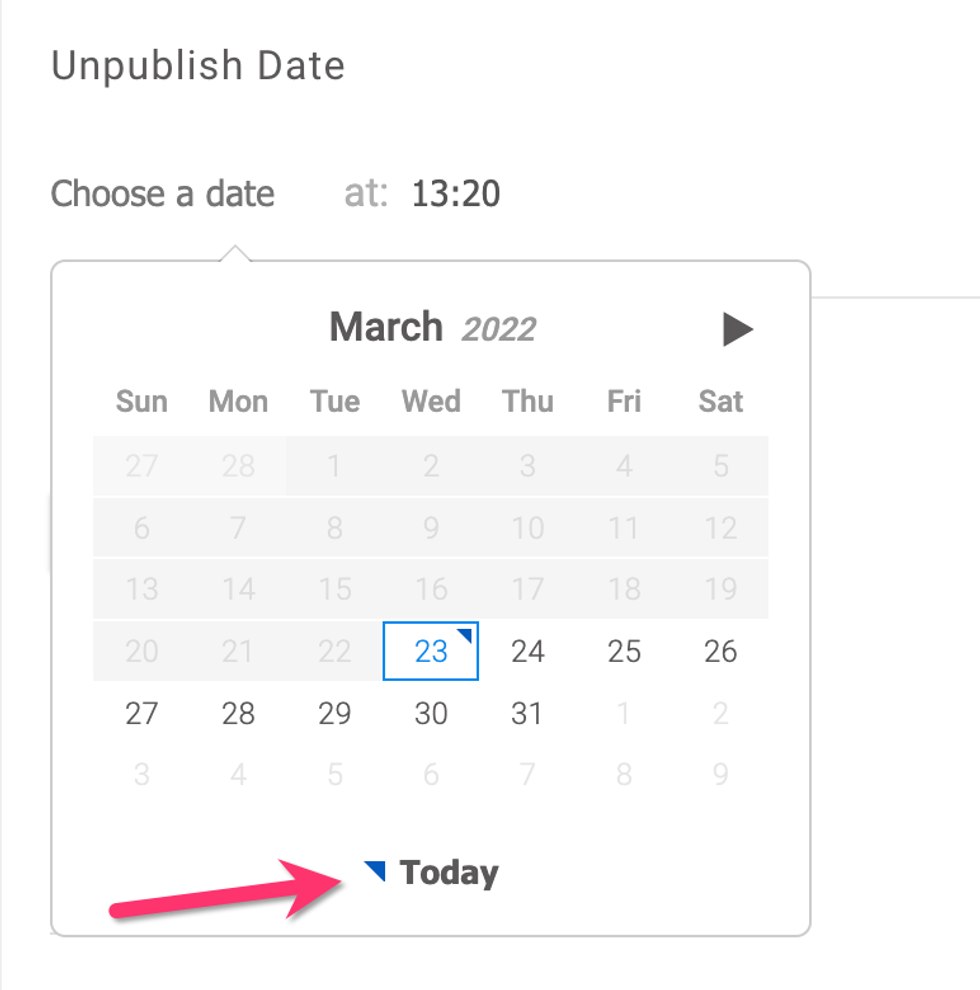
You can set a time for your post to be unpublished from your site, however you will still be able to access it from the Posts Dashboard in your Drafts folder. Use the calendar feature to set the date and time. You can click Today at the bottom of the calendar to unpublish as soon as possible.
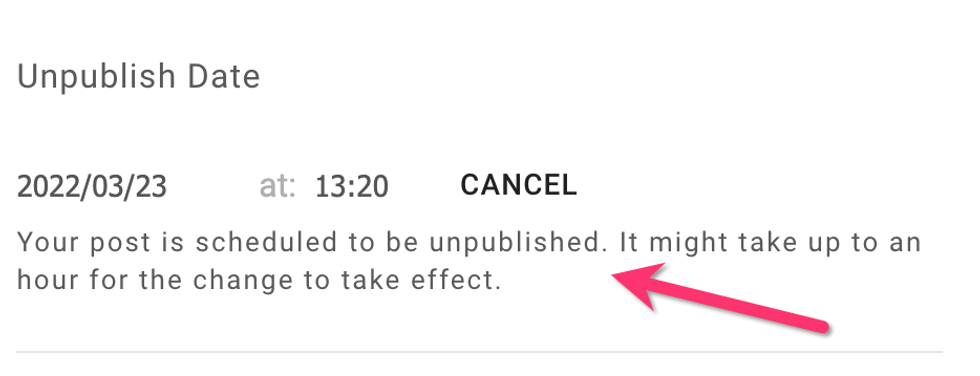
Once entered, you will see your desired unpublish date displayed. Note that it can take up to one hour for the change to take effect. Click Cancel to cancel the unpublish date and keep the post live on your site.
Lock Post
You can lock posts that are being actively edited through the Sections Dashboard. When a post is in a section that is locked for edits, the article will be locked. It doesn't matter if it's in several sections that are editable, either. We prioritize lockdown mode.
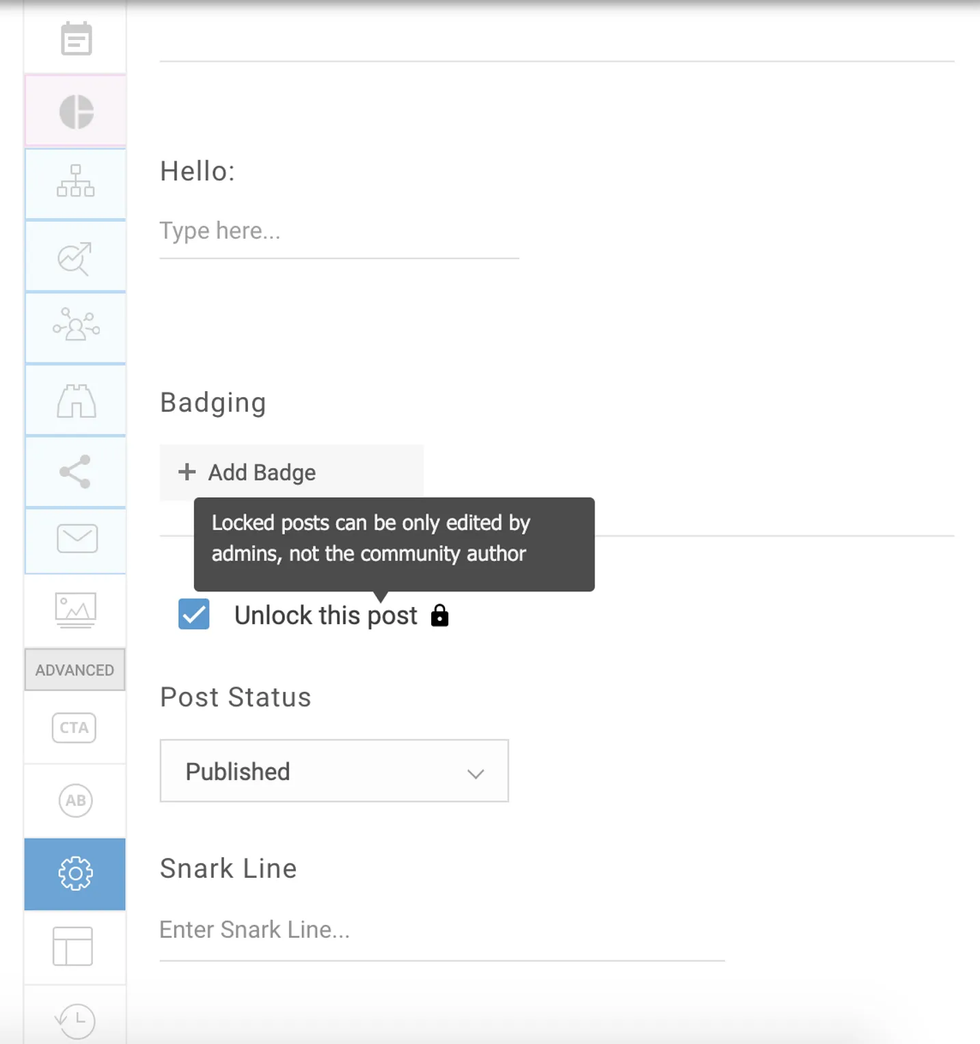
A post can be manually overridden by an administrator or editor in Entry Editor by going to Advanced Settings and unticking the Unlock This Post checkbox:
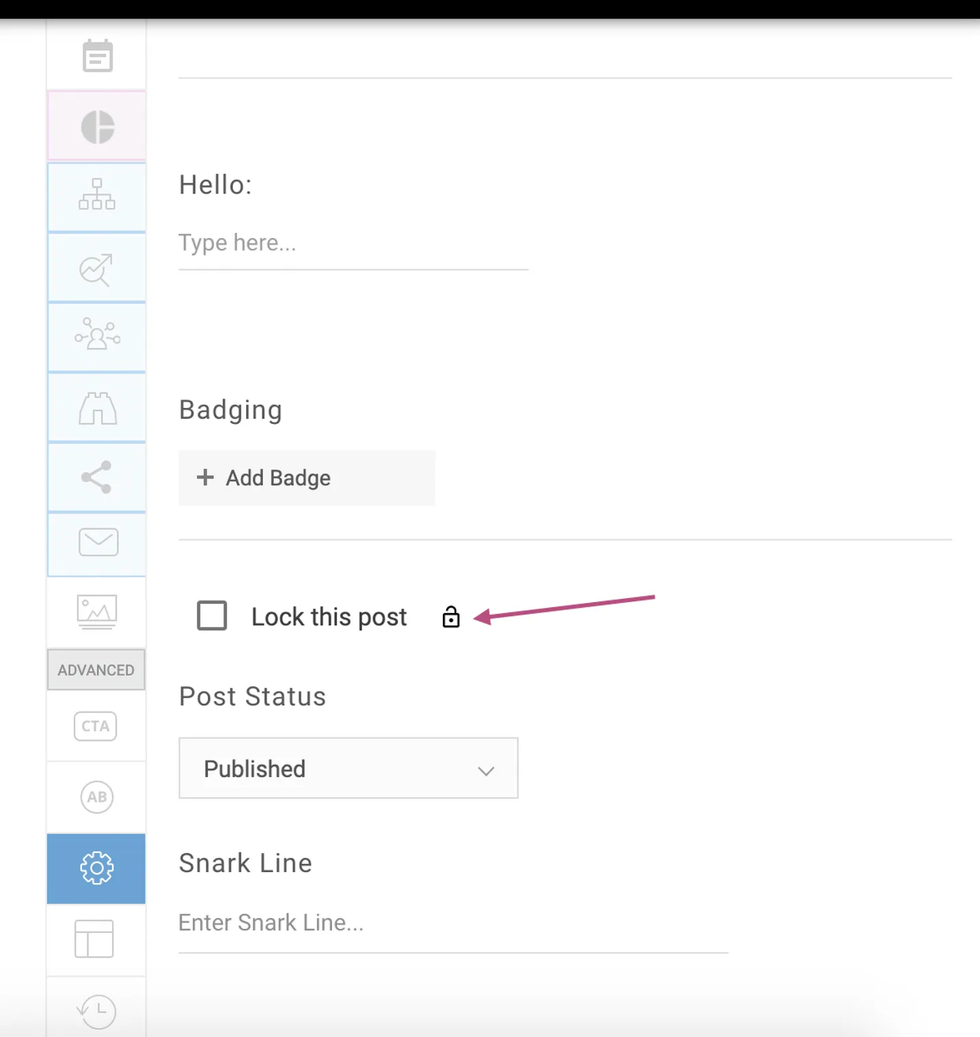
Click here to learn more about locking posts.
Badging
You can assign badges to certain posts and authors. Some sites in our network use them to flag their promoted content, others just like to have a cool way to categorize their content.
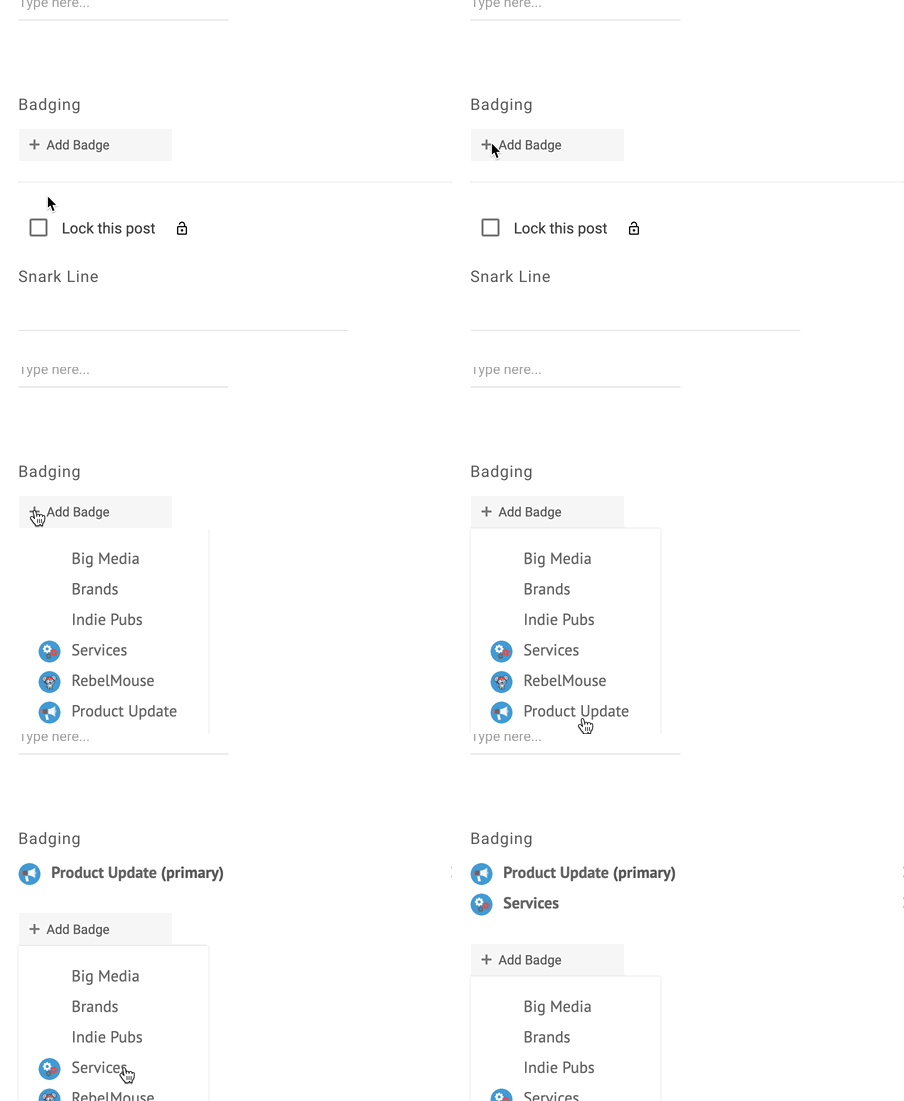
Click + Add Badge to assign a badge to a post. From there, you will see a drop-down menu of your saved badges. Select your desired badge to assign it to the post.
The first badge you select will be the post's primary badge. You can assign multiple badges to a post, but your primary badge will show up first.
Snark Line
The snark line is an additional subheadline for your post. If you would like to use this field, contact your account manager.

Disable Ads
You can disable any ads you typically have enabled for posts on your website. To do so, tick the checkbox next to Disable Ads .

Make the Most of RebelMouse’s Entry Editor
If you have any additional questions about Entry Editor’s Advanced Settings, or would like to learn more about how you can customize your Entry Editor to cater to your team’s workflow, talk to your account manager or email support@rebelmouse.com today.


