At RebelMouse, we are always trying to make our platform fit with your workflow. That's why we recently introduced customizable Entry Editors that allow for different types of content to have different creation and editorial implementations. This lets you step beyond the bounds of most CMS platforms to help your writers visually understand how to create specific types of content.
One recent entry into our list of customizable editorial experiences is for newsletters. In this post, we describe how we've set up Entry Editor to allow you to search for past articles, drag and drop articles into the main post, and even visualize your newsletter template in Entry Editor while writing your post!
How Does It Work?
In a nutshell, we can customize Entry Editor to allow your writers and editors to seamlessly piece together a newsletter from your existing content. From the matching template to your final newsletter product, your editors will know exactly where each important piece should go, including ads, headers, even multiple columns! We will describe in detail how all of this works from creation to publication.
Creating a Newsletter
Once you have a custom Entry Editor set up for your newsletters, you simply access the format directly from your hamburger menu (☰), just like creating a regular post!
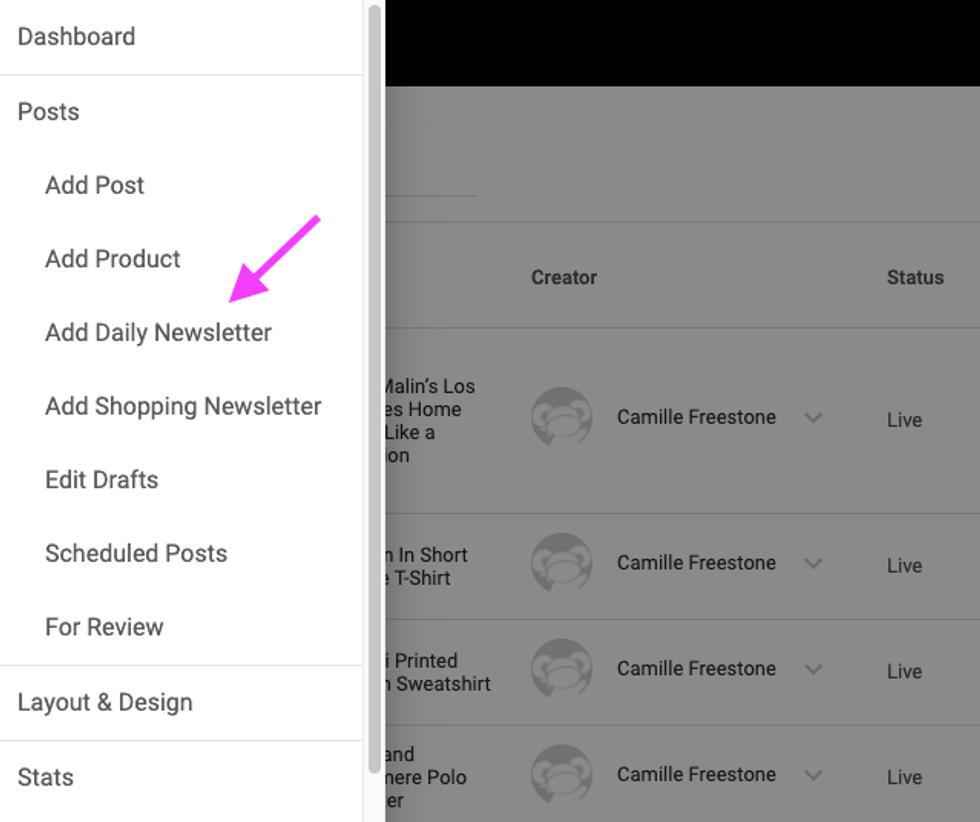
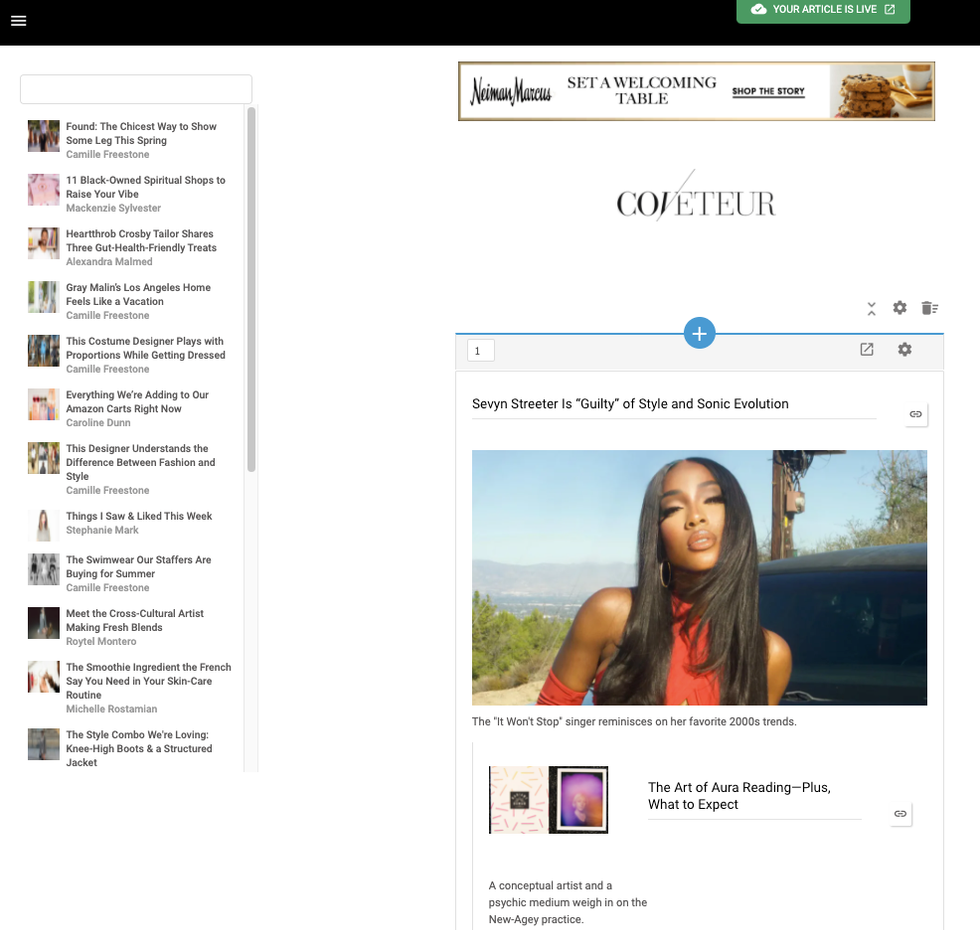
Selecting the Newsletter Post option from the hamburger menu (☰) will open up a custom Entry Editor that's specifically designed for newsletters. In the following image, you can see an example of how it's styled. Note the preset ad placement, the search feature for published posts at the top of the left-hand sidebar, and the limited options in the right-hand sidebar.
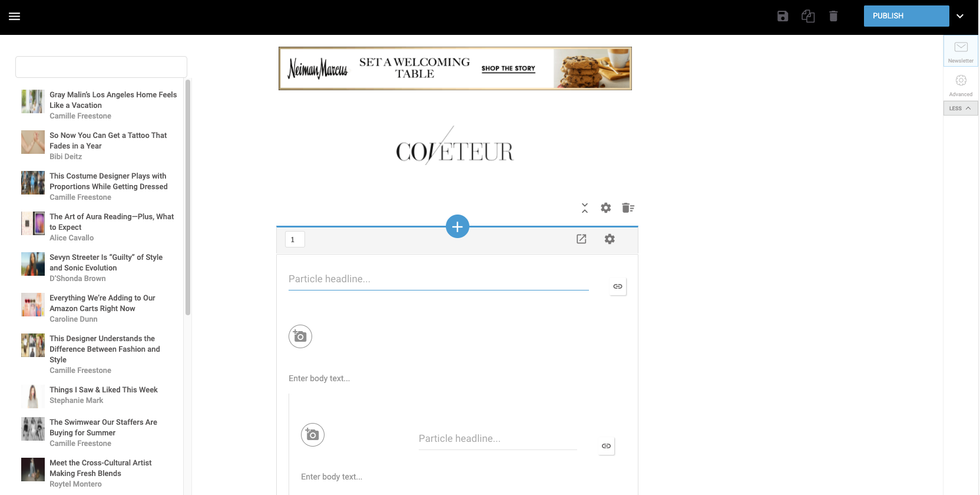
Custom Entry Editor Newsletter Drag and Drop
To populate the posts that are to be included in your newsletter, you simply drag and drop them from the left-hand sidebar and the platform does the rest! This action will populate the lead image, the headline, and the link out. Here's a screencast of how this works:
You may also want to add product listings to your newsletter. In the following example, you just need to get to the product-styled particle, and then click the camera icon. This will automatically open up a search for products within your system.
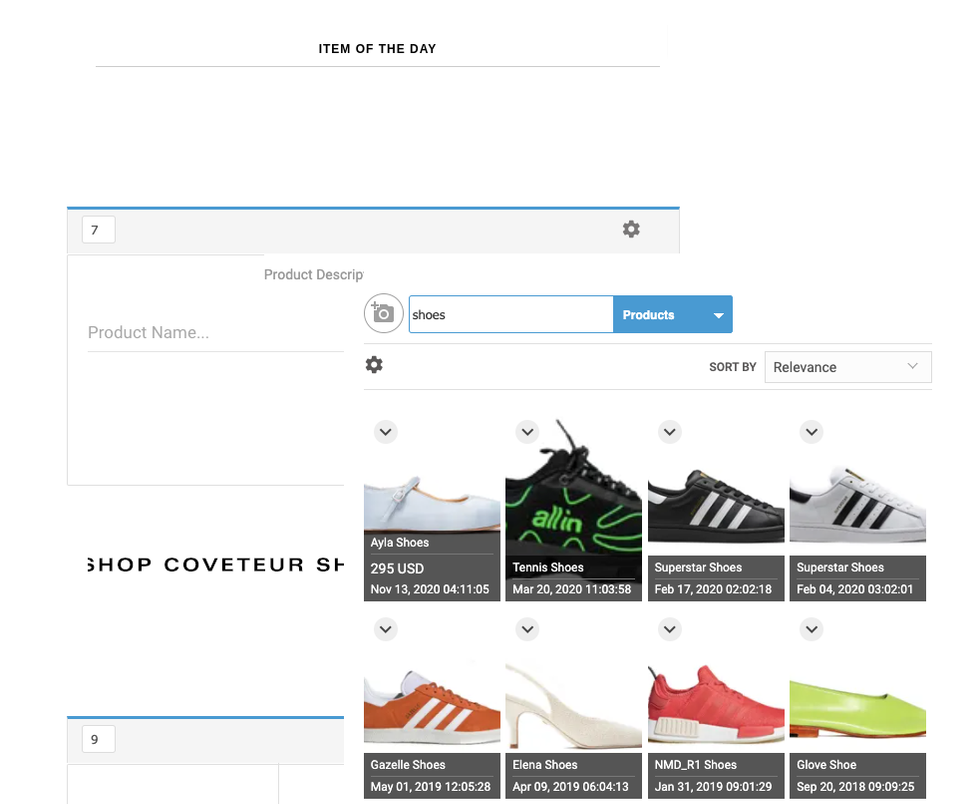
After adding all of the desired particles to your newsletter, you may want to add in ads as well. In the following setup, it's a simple matter of adding your ad as a custom field in the Advanced Settings tab of the right-hand sidebar (note that your setup may vary):

Comparing Entry Editor to a Sent Newsletter
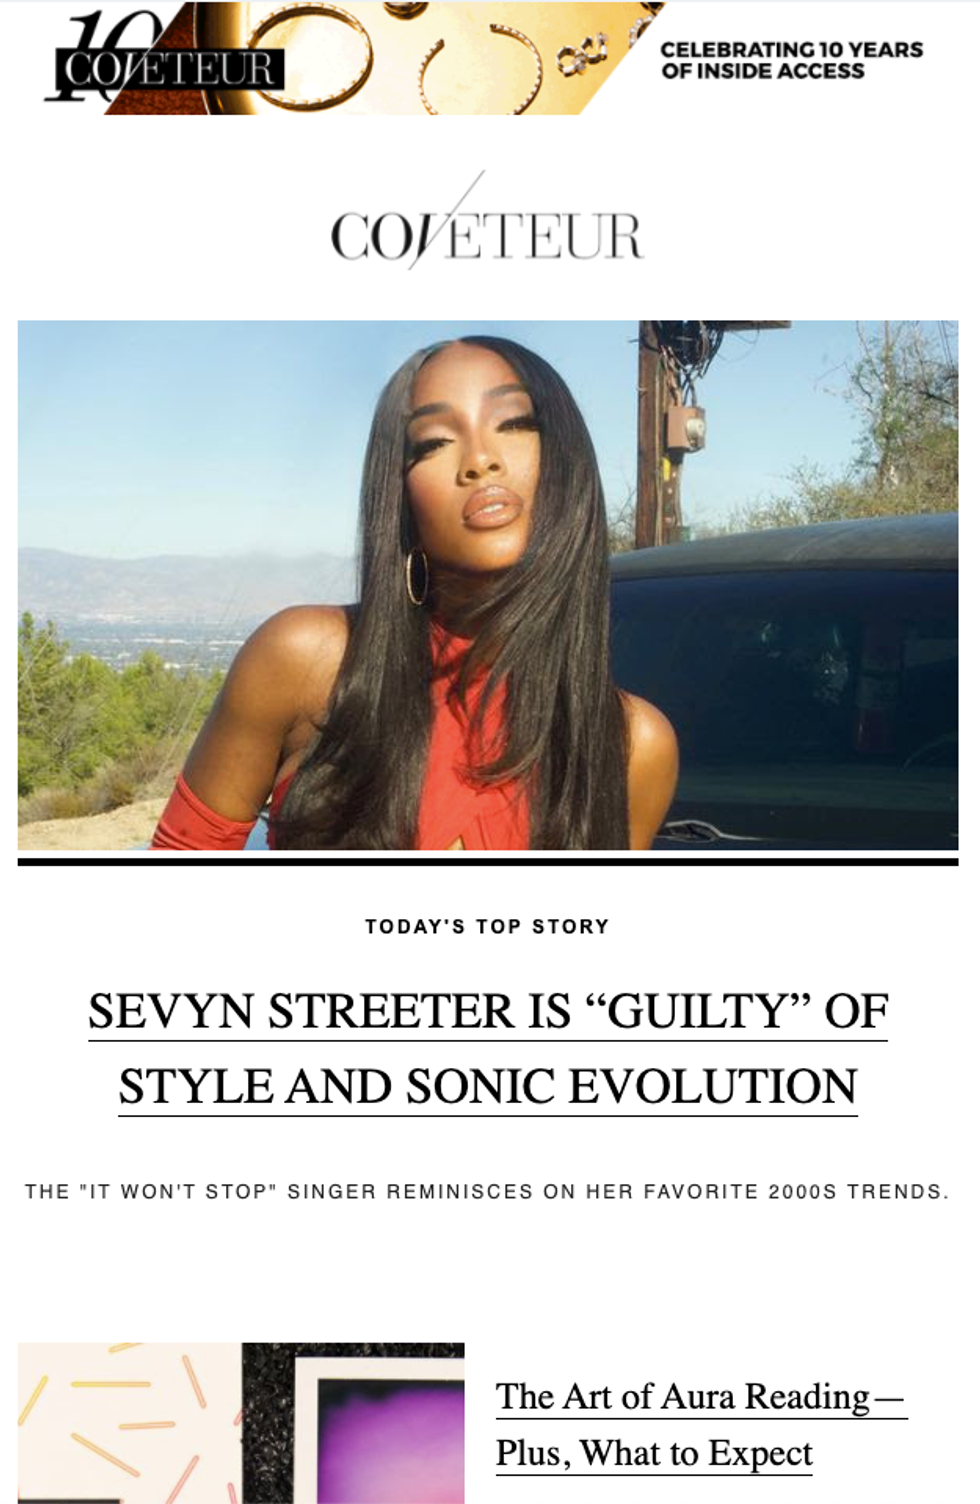
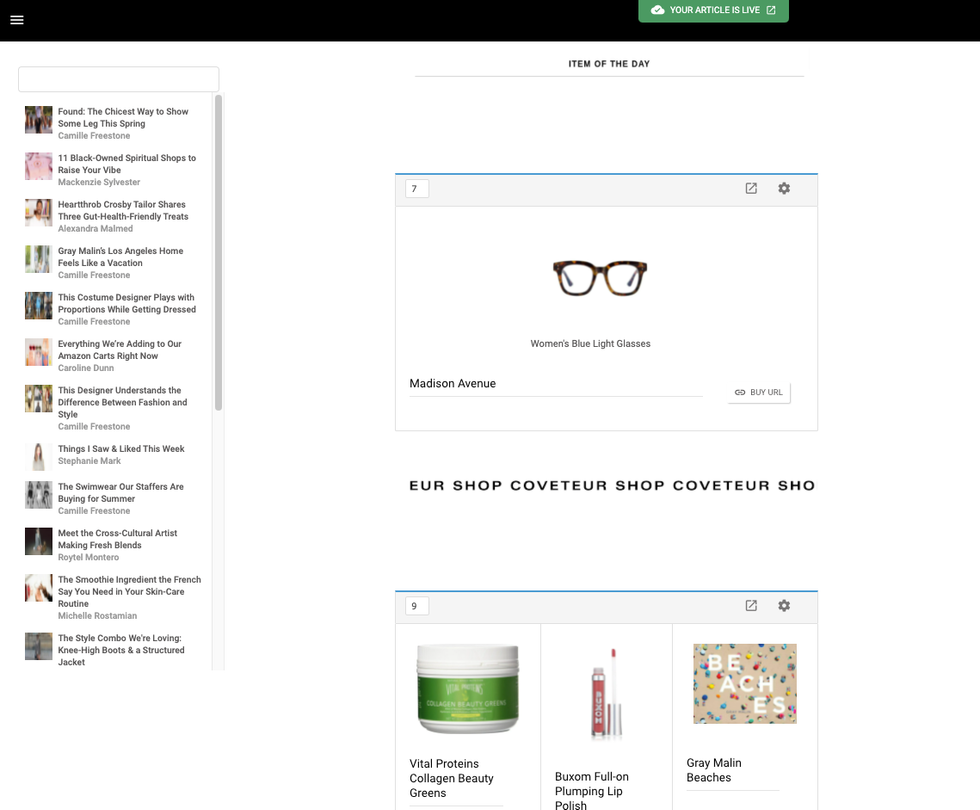
By just seeing the layout of Entry Editor for newsletters, you're probably wondering how it all maps out to be a real, super beautiful newsletter. Well, we map our fields to your email service provider's templates so that the final product is spot on. The following is a comparison of Entry Editor and a newsletter example in Mailchimp.
Entry Editor
Live Newsletter
Entry Editor
Live Newsletter
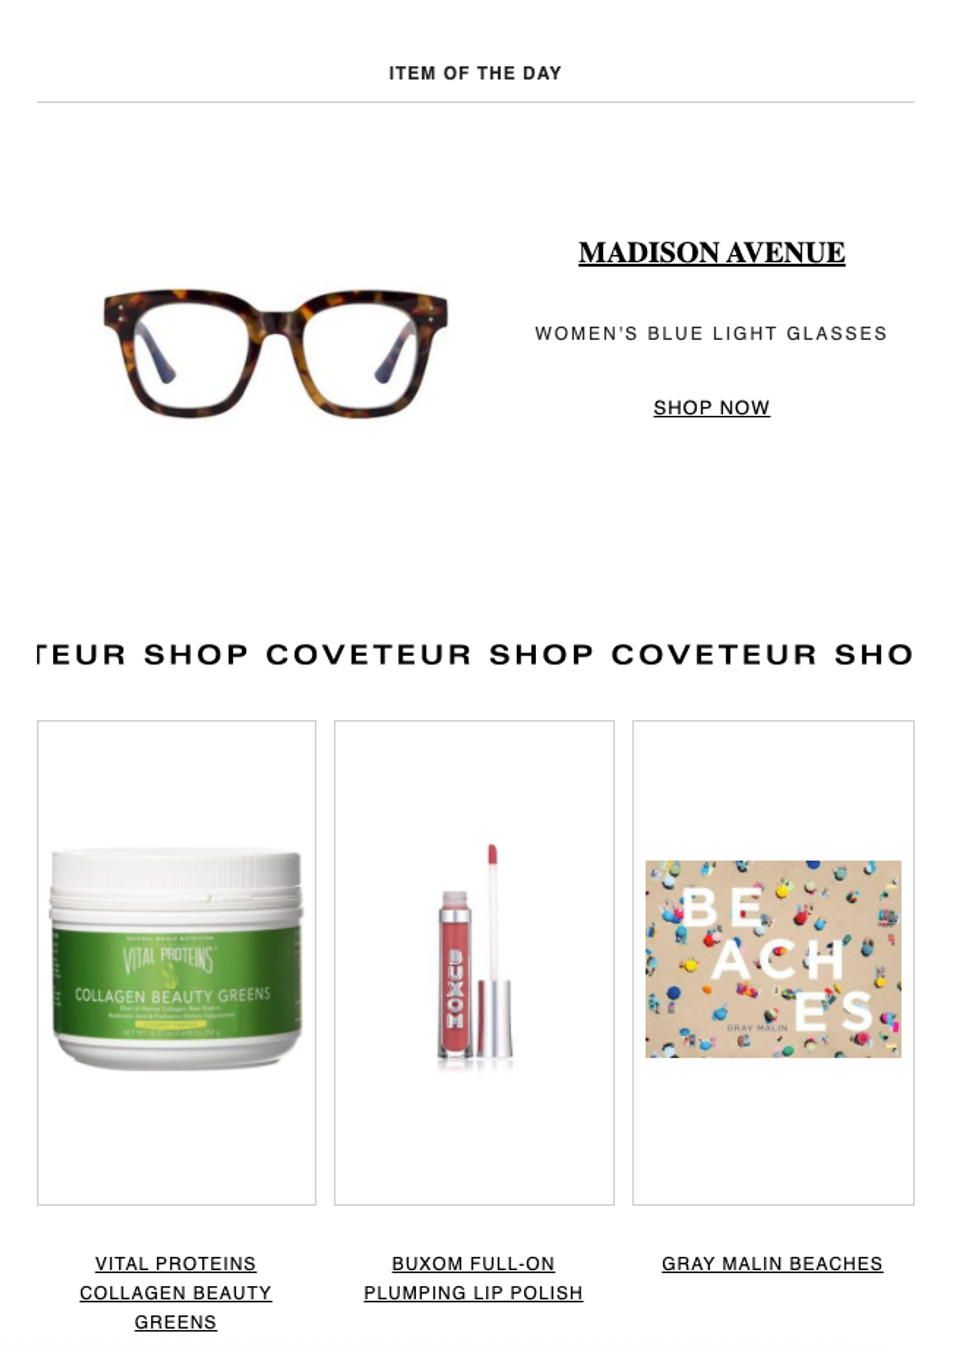
Sending the Newsletter
When you have your newsletter fully built out, you'll definitely want to send it to your audience! We make this part easy as well. You simply click the Newsletter tab in the right-hand sidebar and fill out a small handful of fields:
- Determine if you want to send when you publish, or schedule it to send at a different time
- Select your destination list
- Select your destination group
- Select your template
- Add your subject line
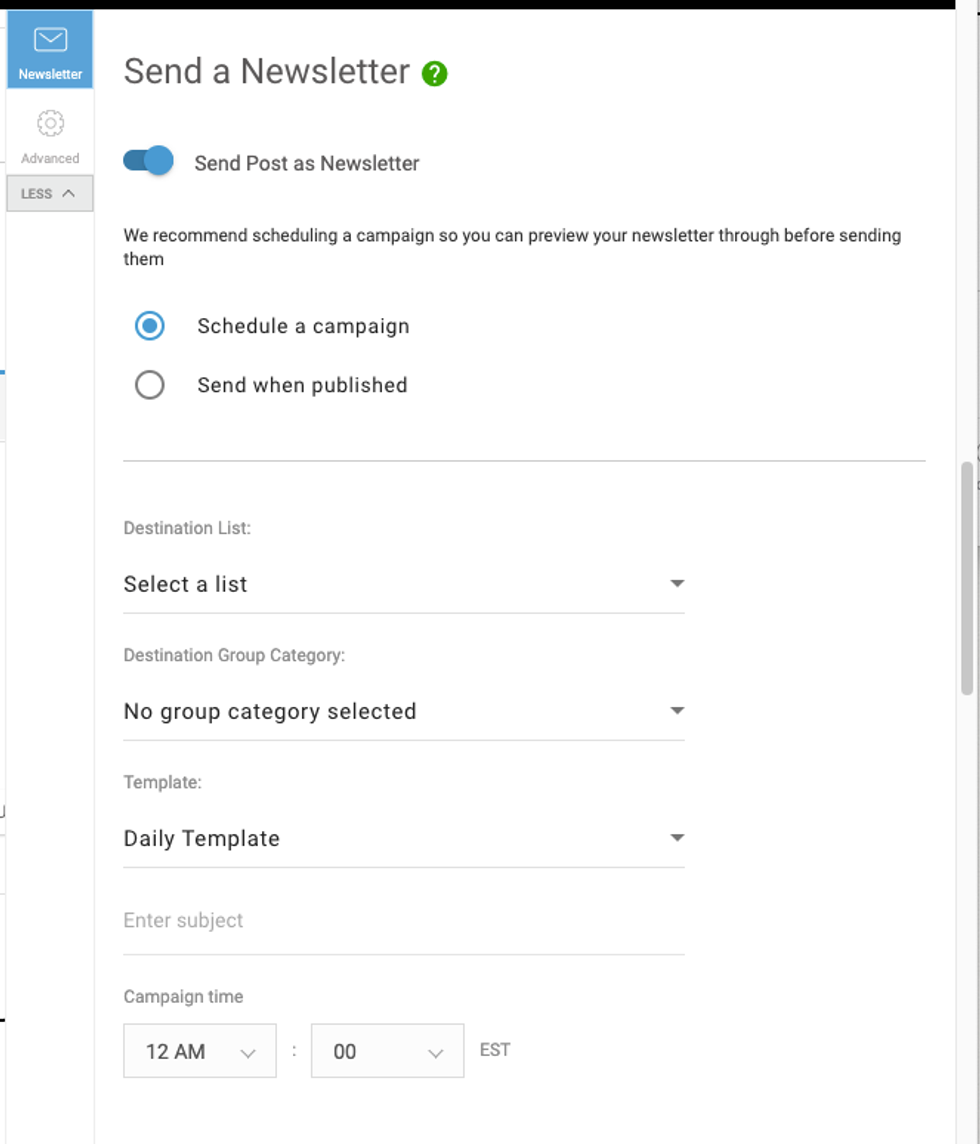
Then, depending on if you are sending the newsletter when you publish, or scheduling it for sending at a different time, you either select the appropriate time, or go ahead and publish! We are able to set this up so that the post will send to your email service provider (e.g., Mailchimp), while simultaneously being routed to a designated section on your site. This way, the newsletter can go to your subscribers and not be featured prominently on your site (unless you want it to be!).
If you are interested in having this feature set up, please contact your account manager or email support@rebelmouse.com today!


