Great sites will often have content that follows a particular pattern, or have specific fields that need to be added to posts of a particular type. That's where custom fields come into play. Custom fields can be anything you need them to be, from checkboxes, to free-form text, to even phone numbers! During content creation, you can then fill out the custom fields as needed for a post, adding great details for your readers without any additional coding or effort. You can even create custom fields for your users !
Example of Custom Fields
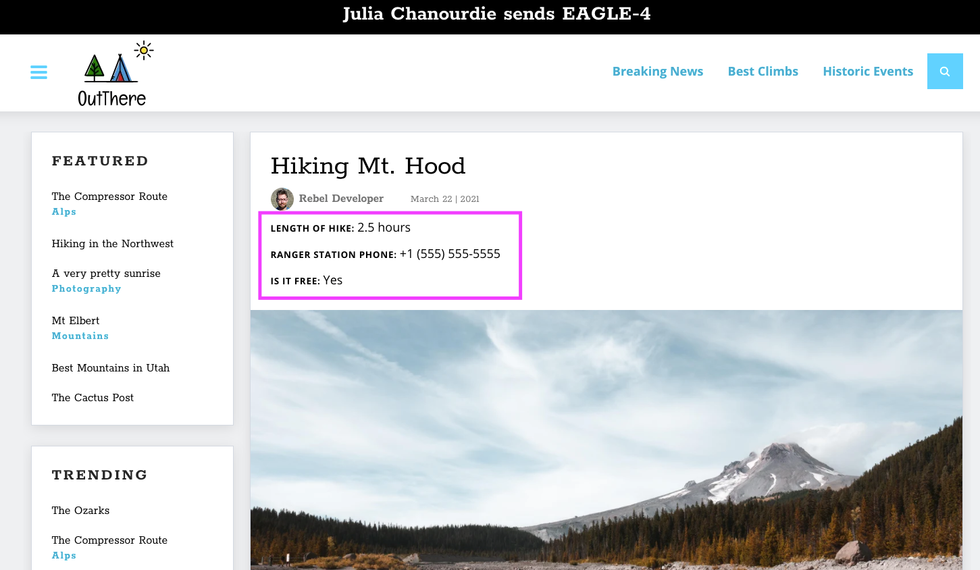
Let's say that you have a site that is focused on the outdoors. You might have posts about great hikes all around the country, or even the world! Some types of custom fields that could be useful are whether the hike is in a free location, or if you have to pay to take the hike. Or you may want to add details on the average length of the hike. Or you may even add in a phone number for a nearby ranger station! These are all easy to create in RebelMouse and even easier to add to your posts.
Types of Custom Fields
This is, of course, not an exhaustive list of what you can create using custom fields. We have many preset ways to define custom fields, and from there your options are pretty limitless. Here are the overall types of custom fields you can create using our Global Settings tool :
- Checkbox: Use this to create a custom checkbox.
- Radiobox: This will create a radio button, enabling users to select from a set of options.
- Dropdown: This will add a drop-down menu with the default values 0–5.
- Text: This will add a text box.
- Rich Text: This will add a text box with a formatting toolbar.
- Date: This will add a text box with a date placeholder using the MM/DD/YYYY format.
- Image: This will create an option to upload an image.
- PDF: This will add an option to upload a PDF file.
- Phone: This creates a text box which will only accept numbers.
- Location: This allows you to either enter or select your current location.
How to Add a Custom Field to a Post
Once you have your custom fields defined in our Layout & Design Tool, you can simply access them from the Advanced Settings tab in the right-hand sidebar of your Entry Editor. Let's go back to our example above to see exactly how to do this.
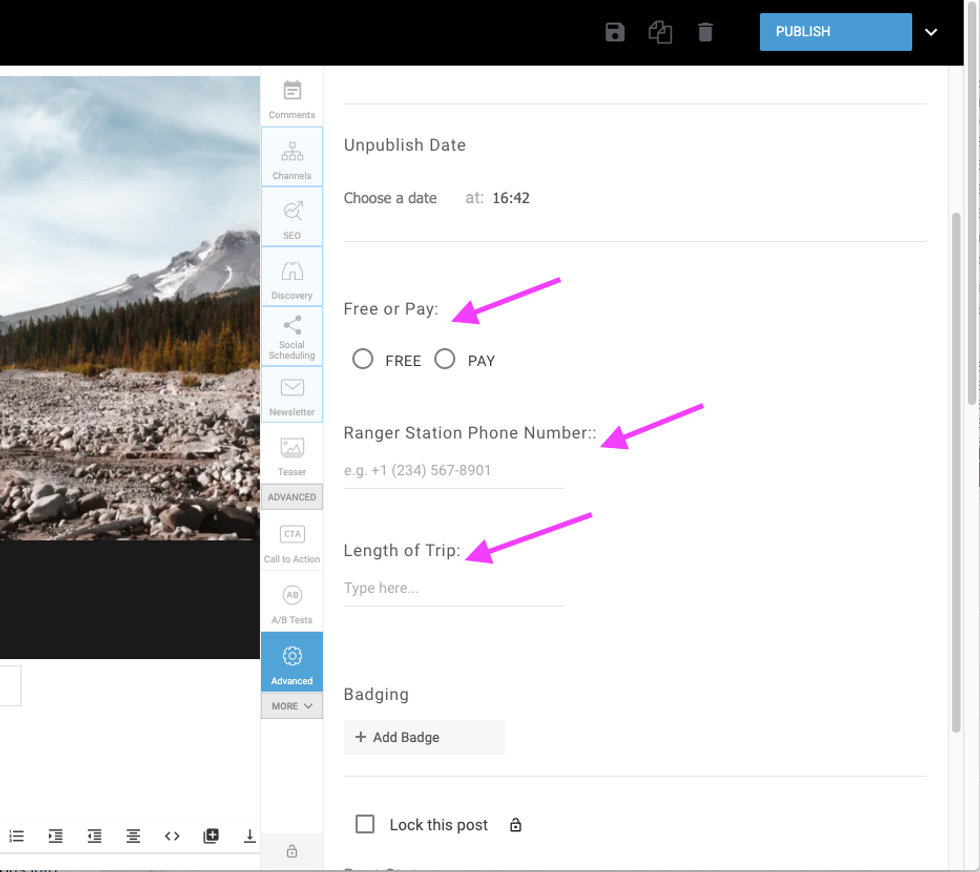
Let's say I'm writing about a trail on Mt. Hood in Oregon and I want to add the custom fields for free/paid, length, and ranger station phone number. My workflow will barely change as I add custom fields to the post!
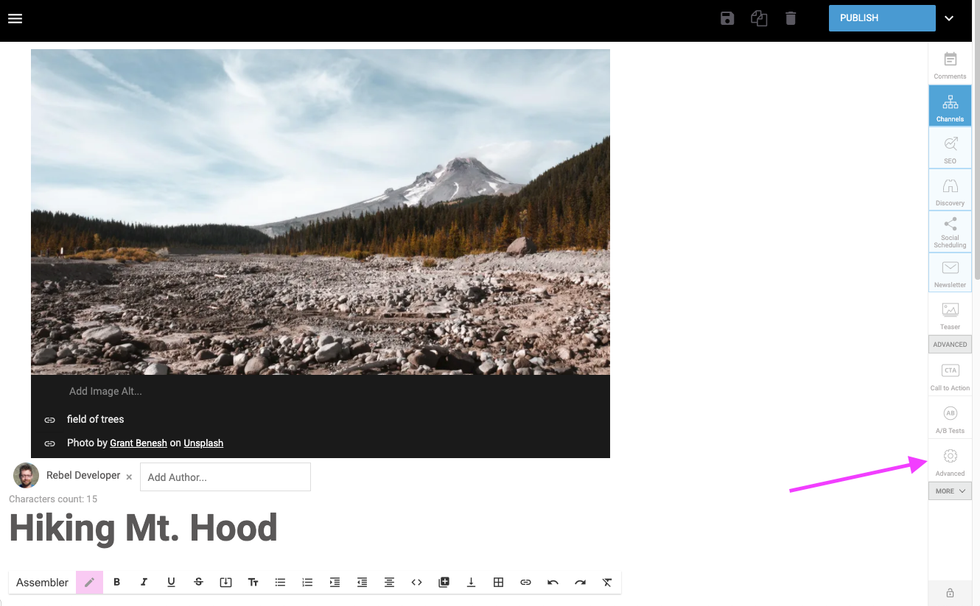
First, you simply create your post, and write it as you normally would. When the post is ready (or anytime during your creation process, the timing doesn't matter!), you will click on the gear icon in the right-hand sidebar:
Next, you'll see the entire Advanced Settings tab. Depending on the number of custom fields you have, you may have to scroll a smidgen before you see the ones that are relevant for your post. Here's how it looks for our example:
All we need to do now is fill these out, and we'll be all set to publish our post! Please note, these are made-up examples here, and this should not in any way be considered accurate details about a hike on Mt. Hood.
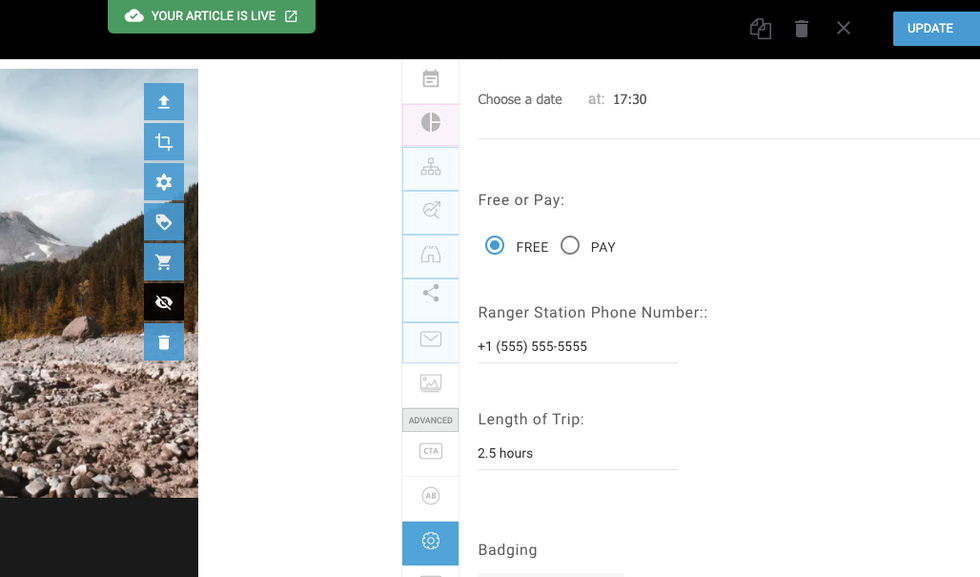
Now we can check out our published post to see our custom fields in action!
And that's how you add custom fields to posts. If you need any additional information or help with setting these up, please contact your account manager or email support@rebelmouse.com .


