The RebelMouse Posts Dashboard is your one-stop shop for details about and accessing your posts, both as drafts or published content. This includes the date of publication (or scheduled publication date) and various details surrounding search and social optimizations, among other data.
We also offer a calendar view version of the dashboard. You can easily access a variety of calendar views by adding certain additions to your base URL:
- Weekly Calendar : /r/dashboard/posts/calendar/week
- Monthly Calendar : /r/dashboard/posts/calendar/month
- List Calendar : /r/dashboard/posts/calendar/list
So, for instance, if your base URL is:
https://myRMsite.com
Then to access the weekly calendar view, you would update your URL to the following:
https://myRMsite.com/r/dashboard/posts/calendar/weekly
Each of the views have similar core features as well as view-specific features. Let’s explore. We’ll start with the weekly calendar.
Weekly Calendar
The weekly calendar view shows your content in a weekly viewer, as seen below:
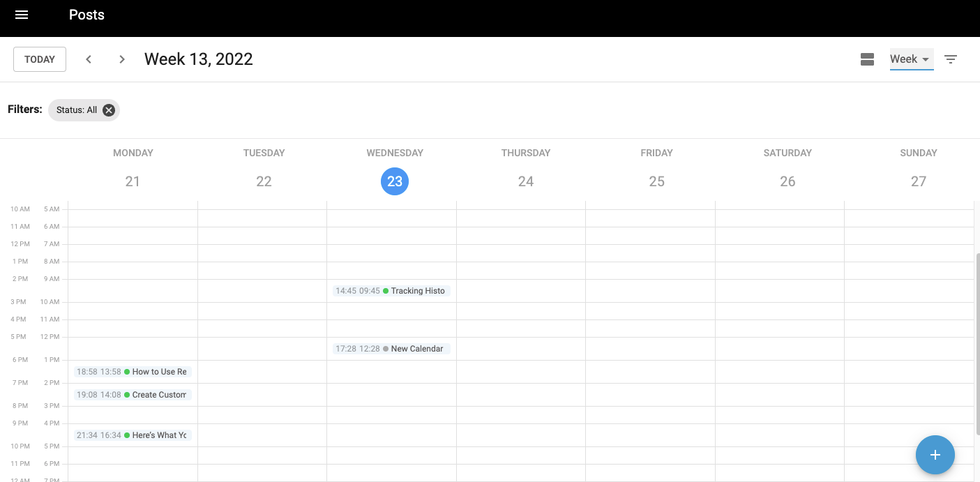
If we start from the top and move our way down, we’ll be able to see all that this powerful tool offers.
First off, you will see in the upper left, a mechanism for scrolling through the calendar weeks. Clicking on the arrows left or right will move you a week earlier or a week later, respectively. This gives you a clear view into what content was published, created, or scheduled during that week. You can also click on the TODAY button to jump back to the current week.
In the far right of the top bar, you’ll see various selectors and filter options. The first button you see allows you to switch from the expanded view to a stacked view, as seen below:
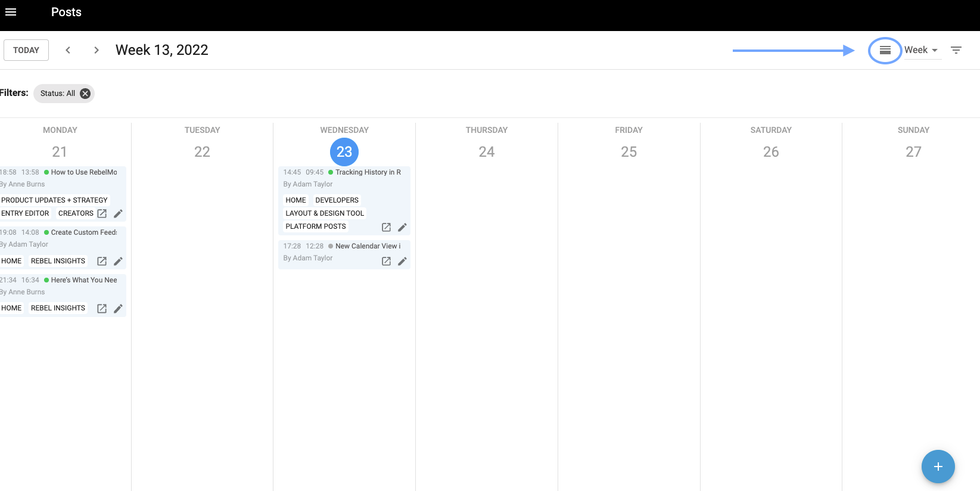
The drop-down menu next to it allows you to easily switch between the weekly, monthly, and list views.
Finally, we have robust filtering that allows you to see only the content, or users, or layouts, etc., that matter to you at any moment. Filtering works the same here as in our standard dashboard filters .
Now that we’ve selected the view that we want, let’s take a look at what displays in the calendar itself. On the far left, you’ll see the time (broken down by UTC on the left, and local time on the right — hover to see your time zone!). Moving into the actual calendar, you’ll see your posts that have either been created but not published yet (gray dot) or published (green dot).
If you click on any entry from the hourly view, you’ll expand the entry and see some additional details (these details are always visible from the stacked view).
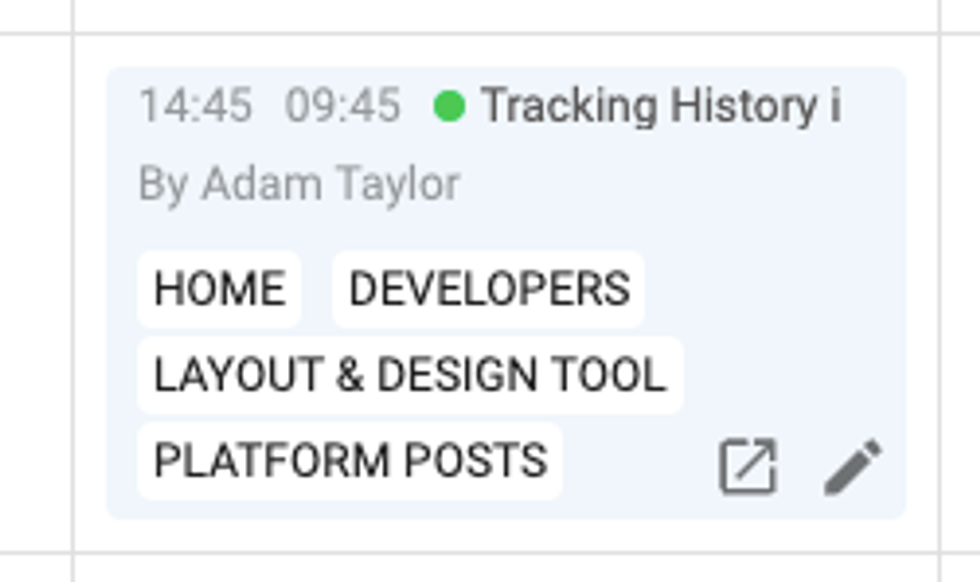
You’ll see the time of publication (or time of creation in the case of a draft), as well as the title, author, and sections that the post is in. Finally, you can visit either the live post or Entry Editor by clicking on the arrow or pencil icon, respectively.
Monthly Calendar
The monthly calendar has many of the same features as the weekly calendar, but gives you a more zoomed-out view of your content workflow. You can simply click on the drop-down menu in the top right and select Month .
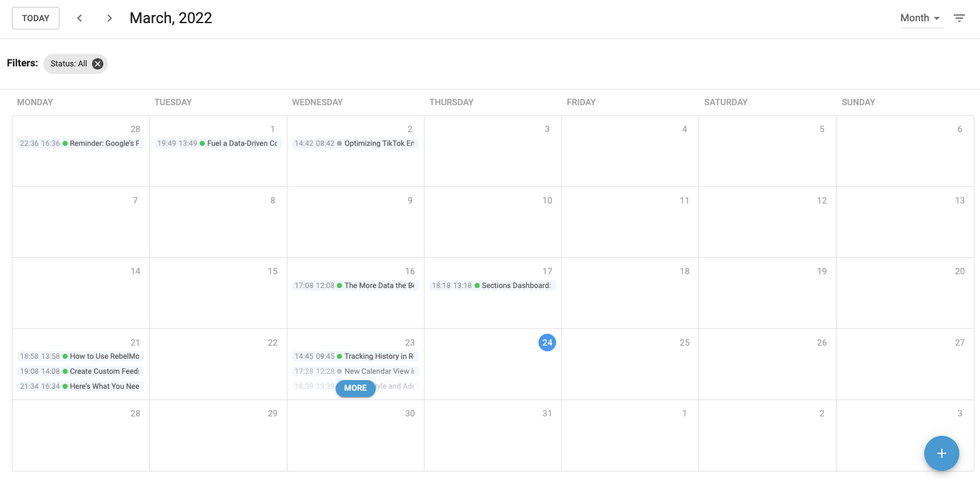
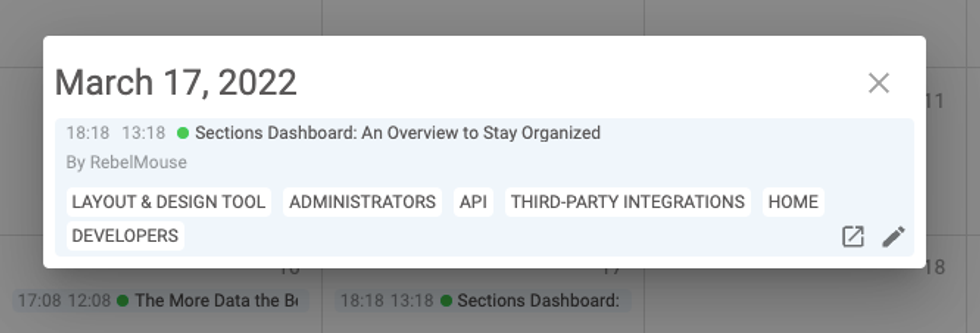
You’ll notice that the content that displays in the daily view for the monthly calendar is the same as in the weekly. If you have more posts for a single day than can fit in the individual box, you can click on MORE to see the remaining posts. If you click on a single entry, it’ll open up a pop-up window that gives you detailed information about that post:
Beyond that, all the features that we learned about for the weekly calendar also work here.
List View
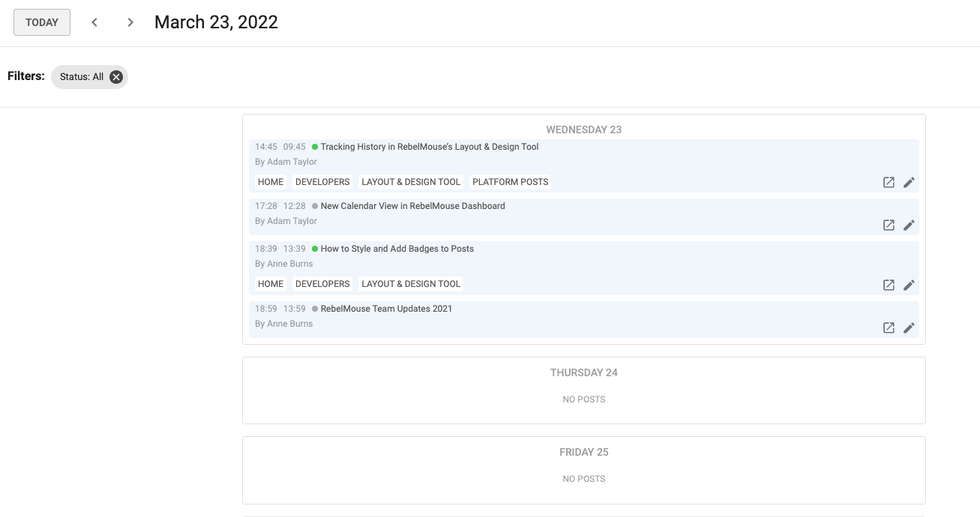
The list view is the simplest glimpse into your content schedule. As the name implies, it’s simply a daily list of content that either was published, created, or scheduled for publication:
Enjoy keeping track of your editorial workflow with RebelMouse calendars!
If you have any questions about this feature, please contact your account manager or email help@rebelmouse.com to learn more.
Not on RebelMouse yet? Let us help you streamline your publishing experience with a next-generation platform designed to drive more reach, traffic, and conversions. Get in touch today to see how we can help.


