Customize every author profile for a personalized approach
The digital publishing ecosystem is a universe of creators. At RebelMouse, we've created a collaborative publishing experience that allows creators, editors, and influencers to work together in a community-style, customizable workflow.
We recently updated our community features with Author Badges , a feature that gives authors on your site a unique image to compliment their avatar. For example, if an author tends to write about "Trending" topics, you could assign a "Trending" badge to them.
To add an Author Badge from our Badges Dashboard, first navigate to /core/r_dashboard/badges on your site. From there, click the blue ⨁ icon in the bottom right-hand corner to create a new Author Badge.
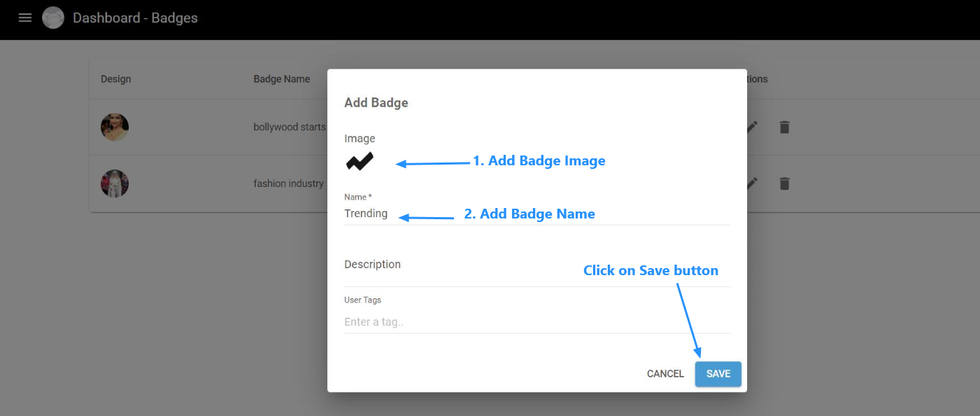
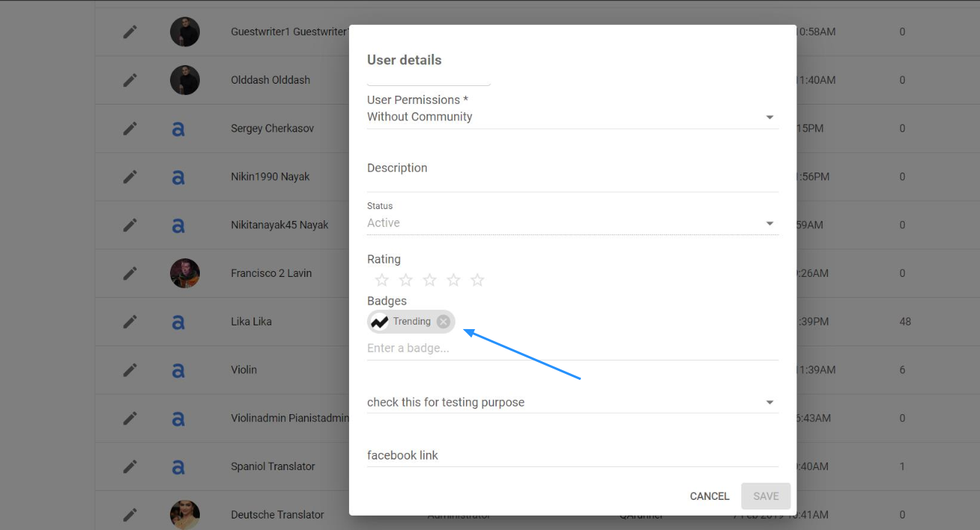
To add the badge to a specific user on your site, navigate to /core/r_dashboard/users to edit the user's profile and add the badge.
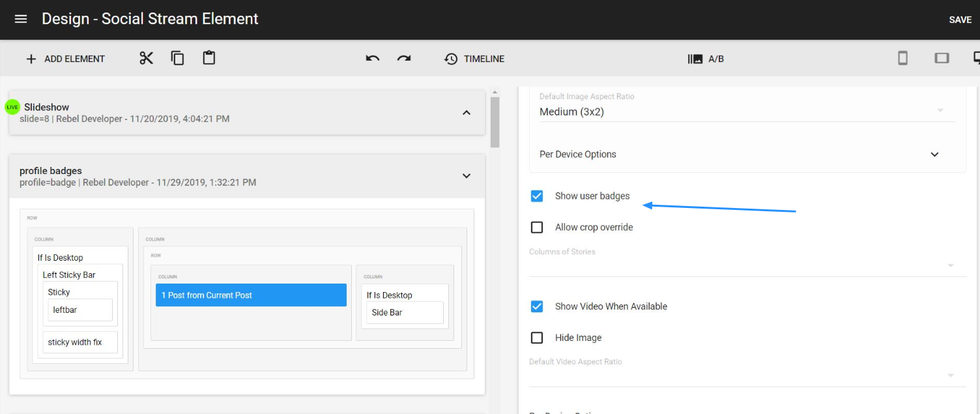
In our Layout & Design tool, Author Badges are a Post element . Tick the checkbox for Show user badges to make them visible across your site.
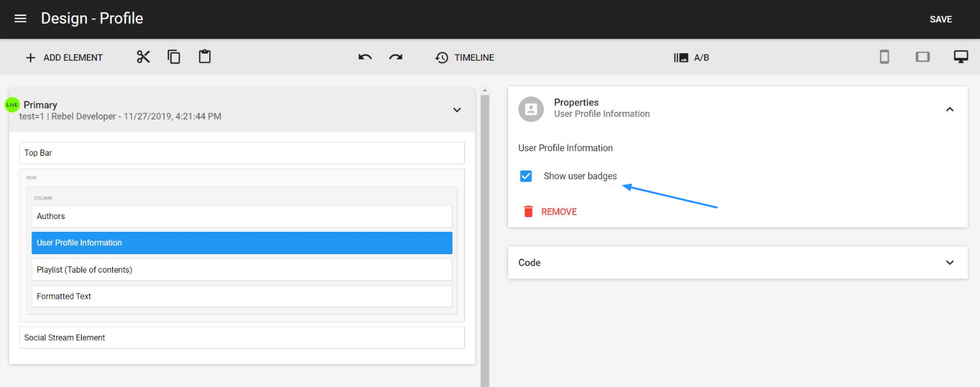
You can also do the same thing when you use a Profile element :
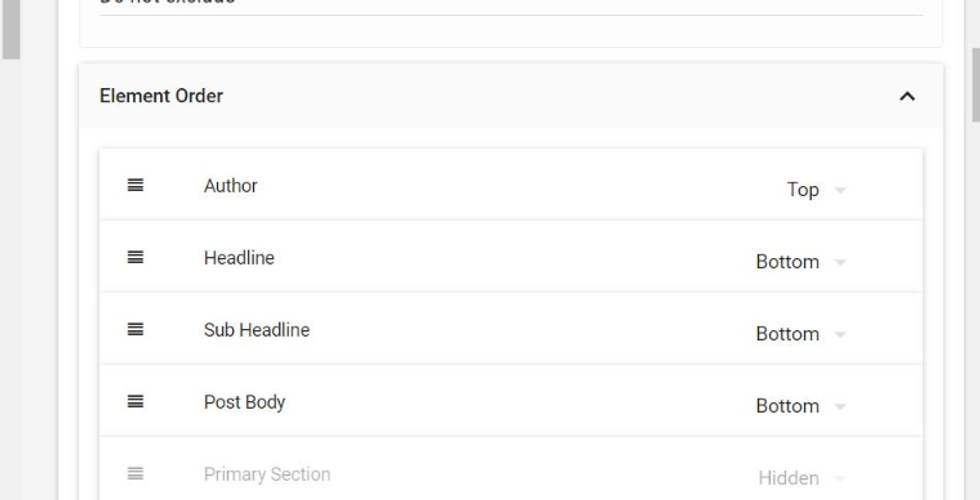
After ticking the Show user badges checkbox in a Post Element , it will enable a new Element Order , as seen below. From here, you can drag and drop the elements to arrange how you would like them to appear in your posts.
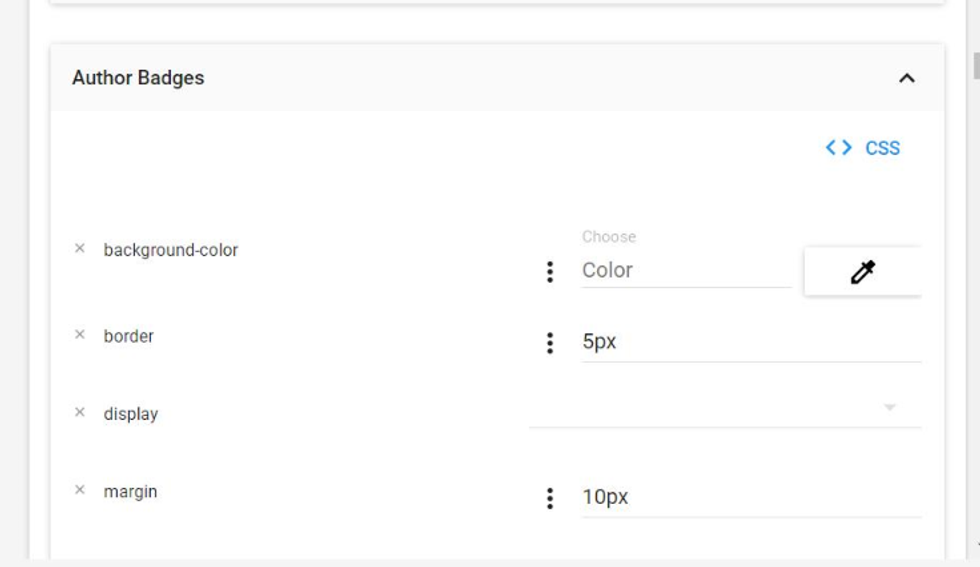
When using a Post element , you also have the option to style your Author Badges using CSS:
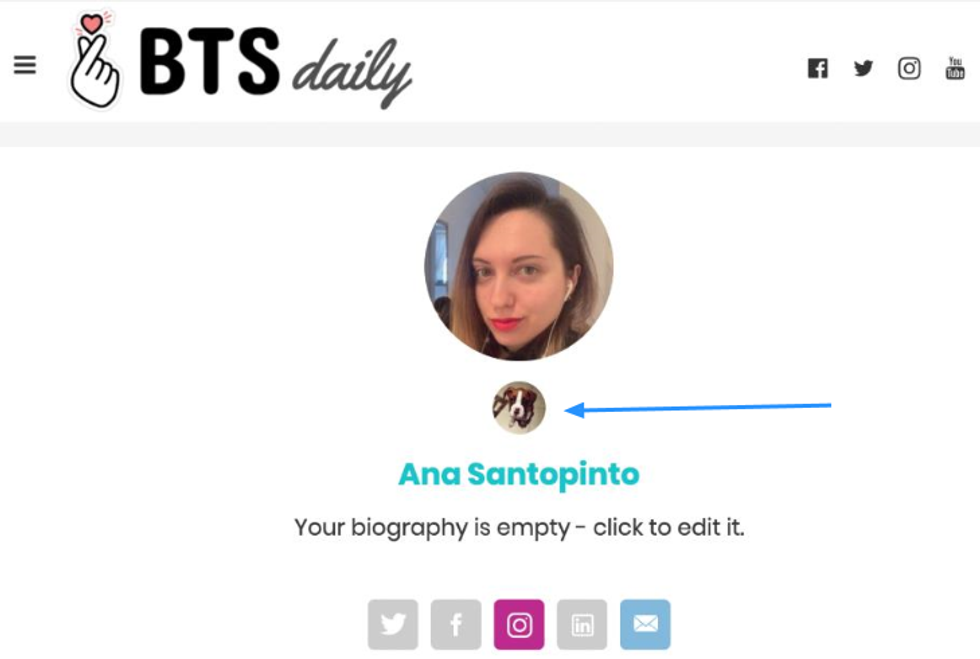
Here's an example of how Author Badges appear on site:
Click here for a full guide on all of the elements available in our Layout & Design tool. If you have any questions about Author Badges, email support@rebelmouse.com or talk to your account manager today.


