Understanding Our Detailed Customization
Jinja Template Syntax: Where to Use and Why
If you need to pass in post variables to third-party or custom-written JavaScript, Jinja variables are a perfect solution.
These are often used for passing editorial tags, sections, and custom fields into ad tags. Click here for more information.
Jinja variables are available to use in any custom HTML element.
Most Commonly Used Jinja Variables
-
Basename: {{post.basename}}
- Available only on post pages
-
Post URL: {{post.post_url}}
- Available only on post pages
-
Post Sections: {{sections}}
- Available only on post pages
-
Post Primary Section Name: {{post.primary_section_name}}
- Available only on post pages if primary section is set explicitly
-
Post Tags: {{tags}}
- Available only on post pages
- Section Page: {{subpage.title}}
- Created Date: {{created_date}}
- Current Year: {{libs.datetime.datetime.utcnow().year}}
- Created Timestamp: {{Created_tse}}
-
Sub Page URL: {{subpage_url}}
- Available only on section pages
- Primary Section Slug: {{primary_section_slug}:}
-
Primary Section URL {{Primary_section_url}}
- Does not work on post page
What Post Variables Are Available?
You can view all variables here . There's also a simple way to view all variables if you add the JSONView extension to your Google Chrome browser. With it, you can clearly view a post's JSON data, as shown in this example . Any of your own articles will follow a similar format.
Example: Spot.IM Integration
In this example, Spot.IM is integrated using Jinja template variables to pass a Post ID and BaseName into the tags.
Insert Variables in Our Layout & Design Tool
Users can click on any element in our Layout & Design tool and select a Jinja variable to insert. Here's an example on a Heading element:
Advanced Usage: Jinja Tag and Post Context Variables
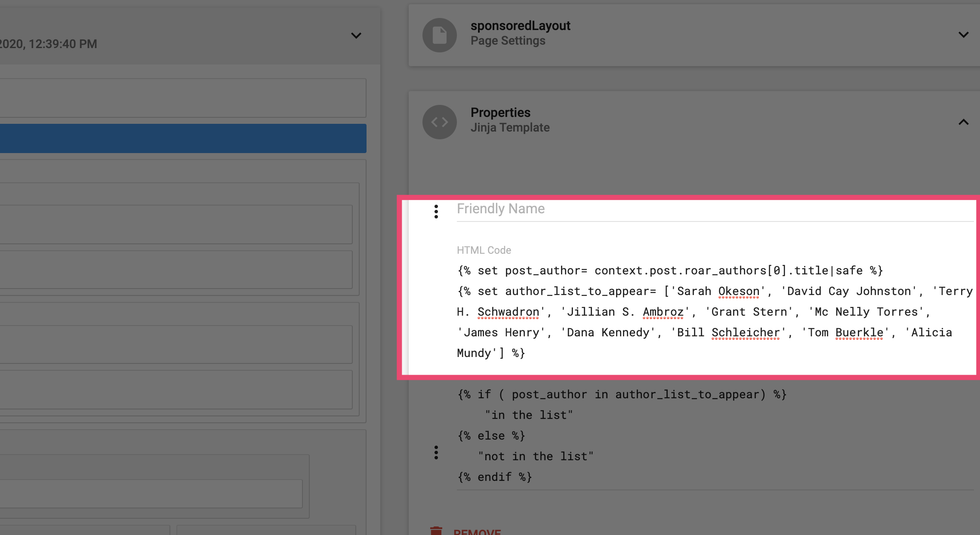
We've exposed the most popular variables used as simple {{post.something}} variables, but sometimes you may need to access a variable that's not exposed. You can use the aforementioned JSONView Google Chrome extension to look at your own JSON and access any of those variables. But it's important to reference the context correctly. Here's an example:
Post Variables
Here are most of our post variables located in one place. The list contains some variables you can't see in JSON. For example, post.attrs (goes from XML to our Layout & Design tool) and post.is_mobile.
Using Variables to Control OG Tags
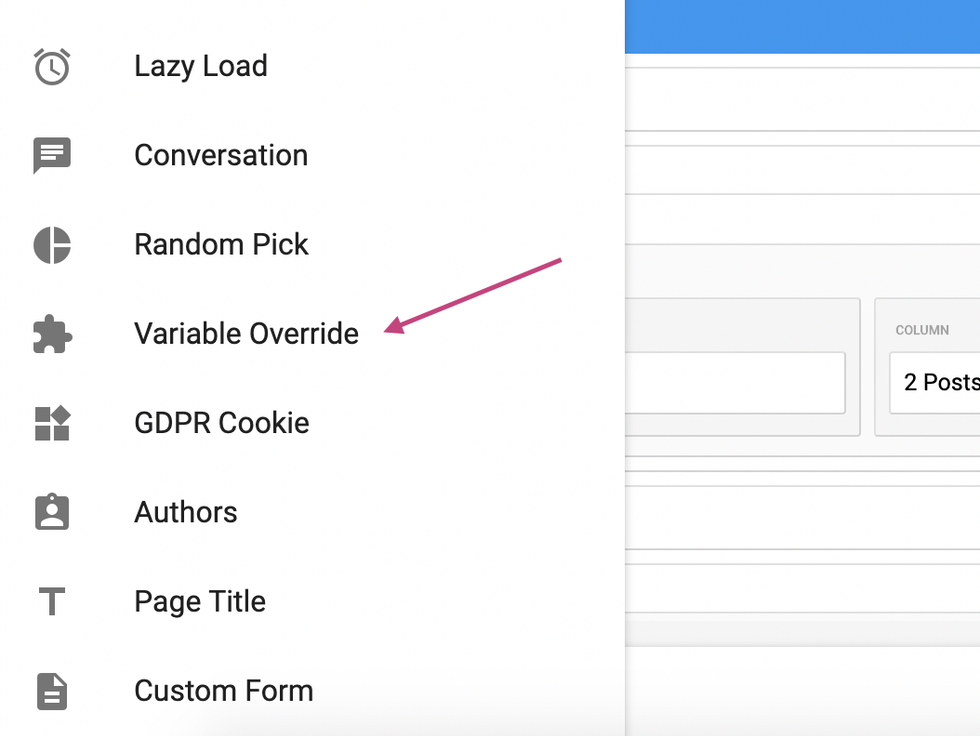
In our Layout & Design tool, you have the ability to create variable overrides. This is helpful when having to set the Open Graph (OG) tags in a section or post page, or in the <head> tag of a page.You can easily find all variables available by inserting the Variable Override element:
Then choose the one you need from the drop-down picklist:
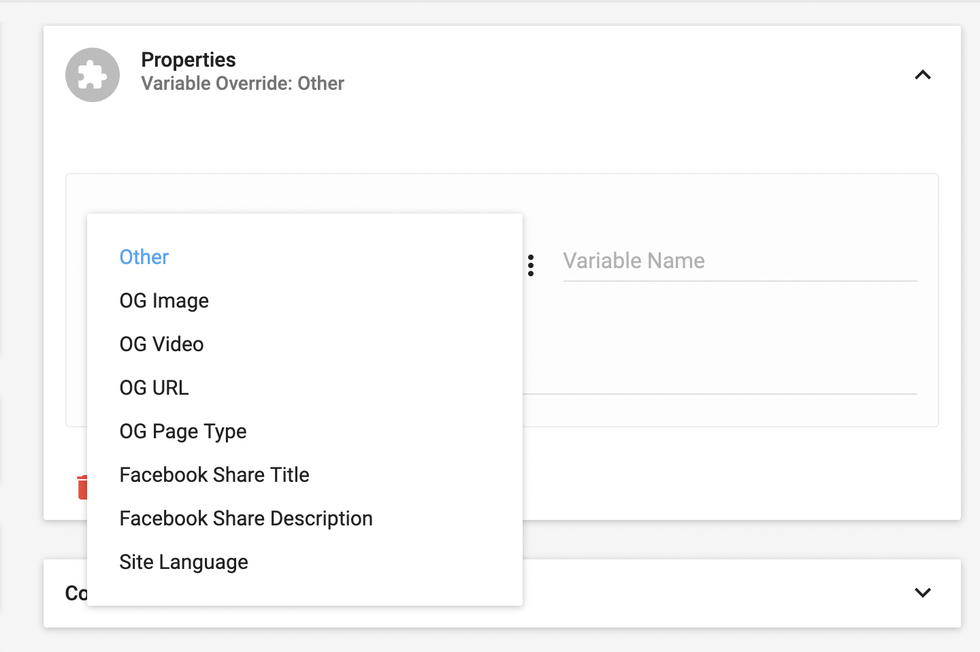
We offer support for:
- OG Image
- OG Video
- OG URL
- OG Page Type
- Facebook Share Title
- Facebook Share Description
- Site Language
Advanced Usage: Using Jinja With Conditions
For using conditions, loops, setting values, splitting, and slicing with Jinja, you should create a new Jinja element. This element should only be used by developers with high levels of technical skill .
First, this element needs to be added from code:
By adding the code, you'll create the element:
Once the element is created, you can start adding your code.
Basic Example Code:
{% if context.post.roar_specific_data.breadcrumb_title %}
    {{context.post.roar_specific_data.breadcrumb_title}}
{% else %}
   {{context.post.headline}}
{% endif %}
You can also loop through tags or check if a particular value is present. Here's a code example:
{% if context.post.original_user_subsite.roar_specific_data %}
<div class="parner_container">
  <div class="partner_headline">More From
  <a class="partner_site_name">{{context.post.original_user_subsite.roar_specific_data.site_name}}</a>
  </div>
  {% for posts in context.post.original_user_subsite.roar_specific_data.posts %}
  <div class="partner_posts"><a href="{{posts.url}}">{{posts.headline}} </a></div>
  {% endfor %}
  <div class="partner_site_info">This article originally appeared on
    <a href="{{context.post.original_user_subsite.roar_specific_data.site_url}}">
    {{context.post.original_user_subsite.roar_specific_data.site_name}} </a>
  </div>
The list of these values can be found in the console, and you can find it by searching for rblms.require('bootstrap'). This is where you'll find the whole context list.

Remember, Jinja is a template engine that puts values in the places you add them to. This means it's scope dependent. So if you set one value based on a specific scope, you need to consider how it'll be displayed elsewhere.
If you have any questions about Jinja variables, email support@rebelmouse.com .


