Live-Blog Feature: Publish Real-Time Updates + Maximize Search Performance

Make sure your audience never misses an update.
Many organizations are facing communication challenges after the recent outbreak of COVID-19. With so much information available everywhere, it is harder than ever to control the message of your own audience.
At RebelMouse, we're constantly iterating on our platform to help you make your content as relevant as possible. In the current news environment, staying on top of breaking stories using live blogs is incredibly important.
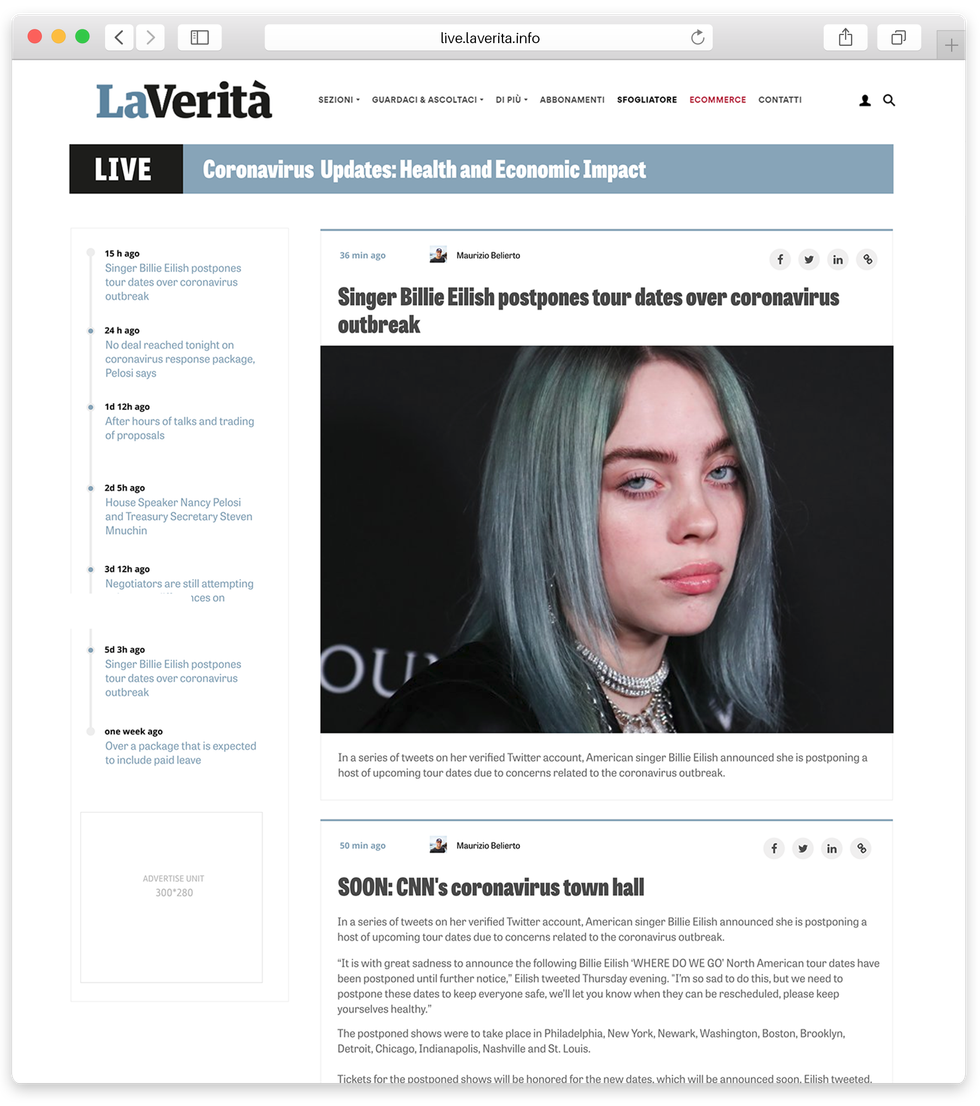
We've implemented our own version of the live-blog experience that's designed to maximize your potential on search. We power this new functionality using WebSocket, which allows for near-instant updates.
The advantage of creating a live blog using RebelMouse is that we index each live-blog update for search so that you receive SEO credit for every single update. This means if one of your live-blog updates hits on a key search phrase, it can drive a lot of traffic from search. This is superior to the traditional way of doing live updates where it was simply embedded JavaScript loading posts.
Here's an example of what this could look like for you when implemented:
How It Works
The functionality of our live blog is built around Sections. To start, you need to designate a section as a "live" section. In order to make a section a live section, use the "Live Section Update" element in our Layout & Design tool and add it to a section conditional like this:
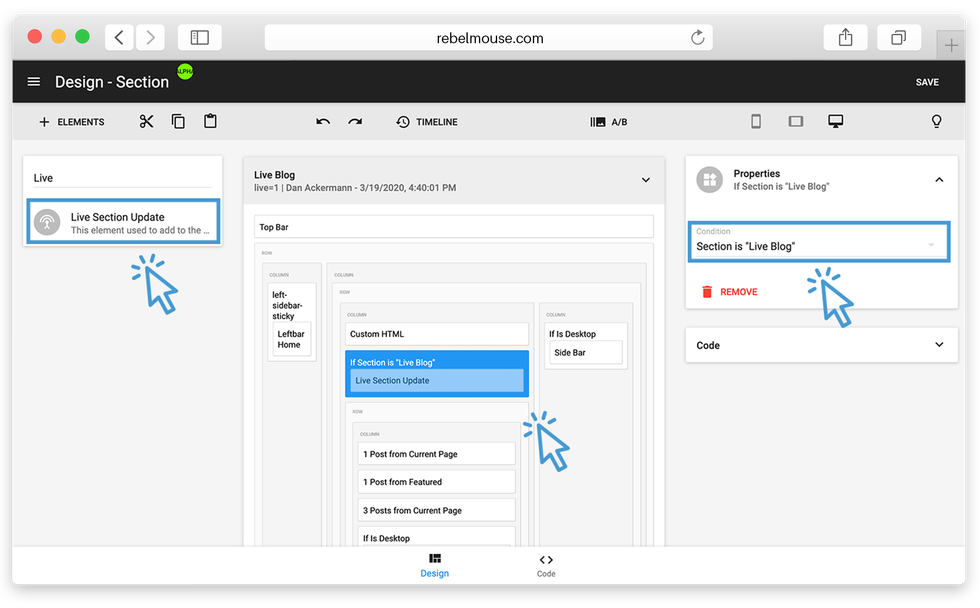
Now when you add posts to that section, they'll be part of the live-blog experience. Adding a new post to your live blog is as simple as creating a normal post and then adding it to the section you just set up as live. In the following example, we've created a designated "Live Blog" section to store our live posts.
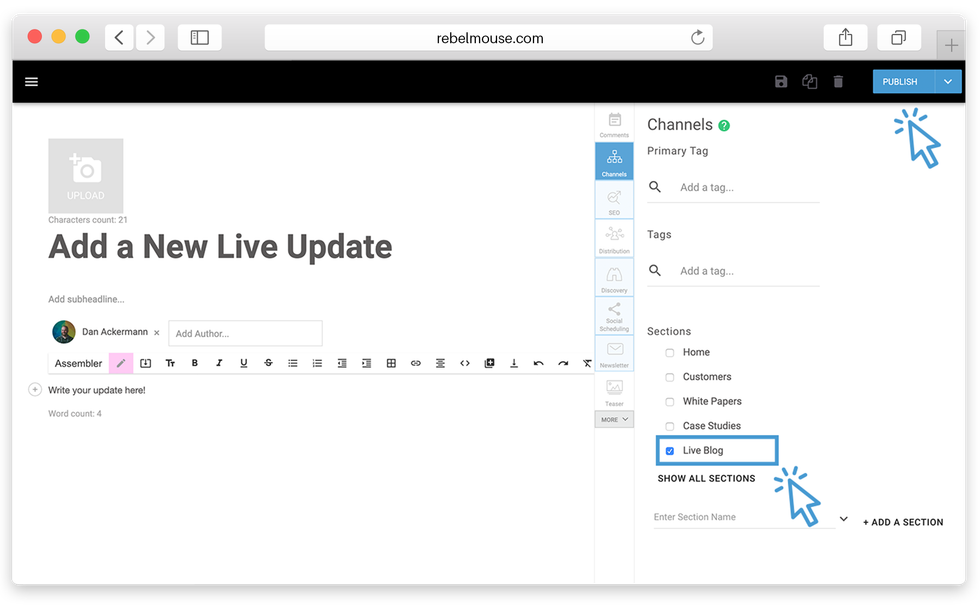
Once you click Publish, RebelMouse uses WebSocket to near-instantly push the post to the top of your live section. This allows you to publish posts quickly as you stay on top of breaking news.
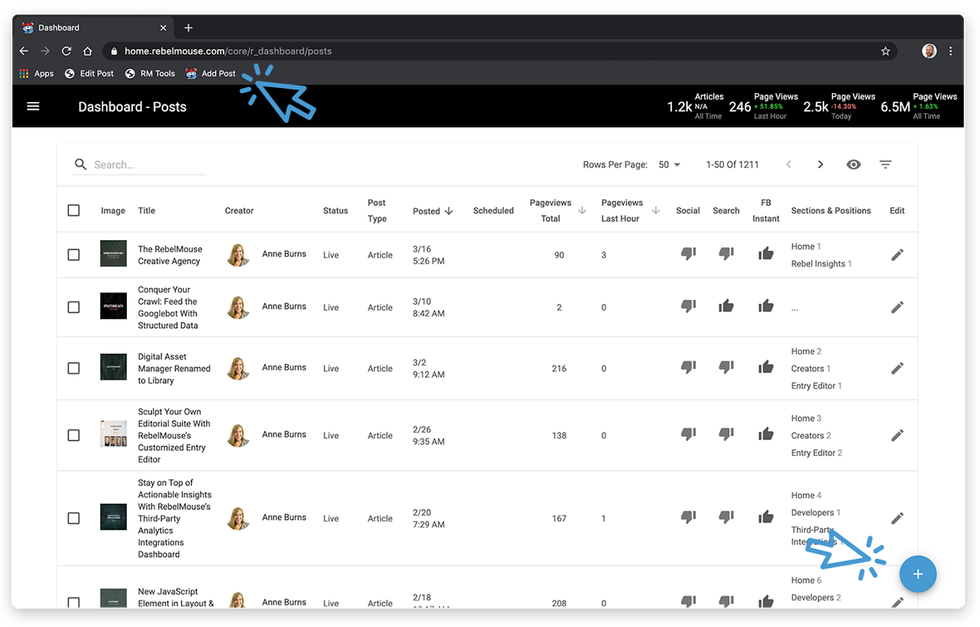
You can make this process even smoother for editors by instructing them to drag the blue "+" icon — to add posts — into their bookmarks bar as a bookmarklet. This way if they need to make an update to the live blog, they can click the bookmarklet, select the correct live section, and publish their post as they normally would.
Post Live Updates With RebelMouse's Assembler
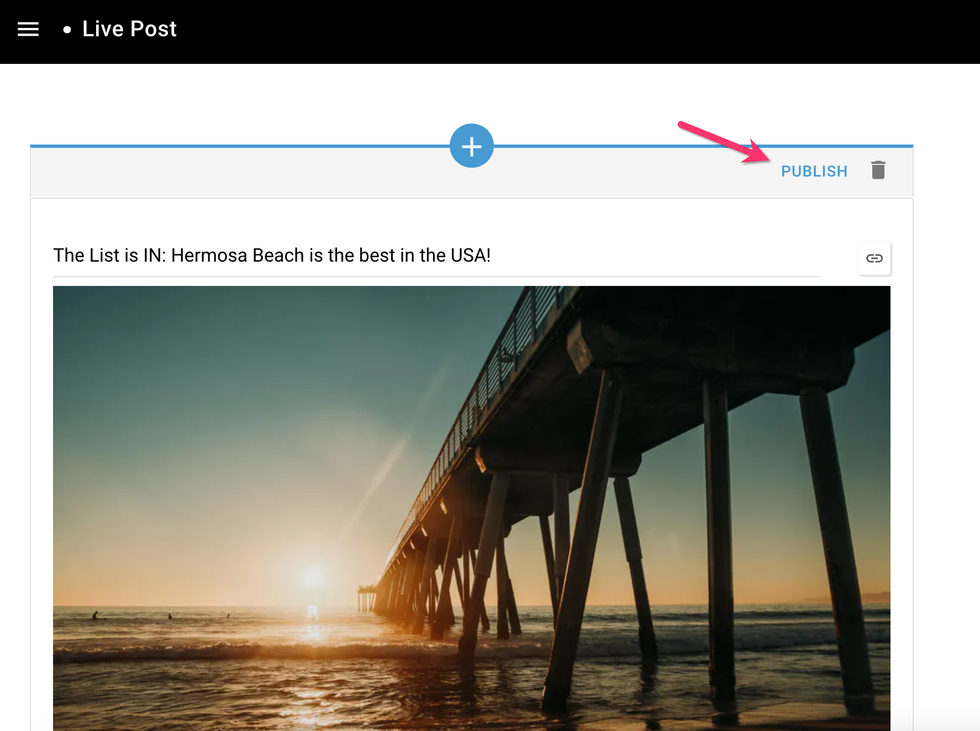
You can also post live updates with RebelMouse's Assembler functionality without leaving Entry Editor. Once you create an Assembler in your live post, you will see the ability to publish each particle as a live update.
When you are ready to publish a new particle as a live update, click the PUBLISH button in the right corner:
After you have clicked PUBLISH , Entry Editor will refresh. You will see a new particle at the top of your Assembler for the next update. The particle you just published will have a new timestamp as well:
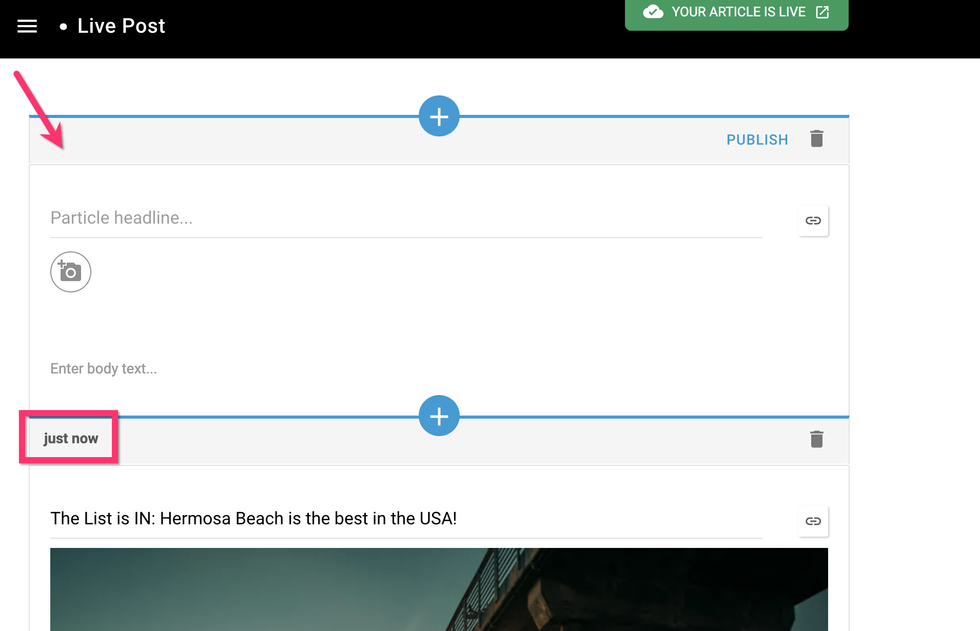
Each particle you add to your live post will have a timestamp of when it was published to show readers the timeline of your story and the most recent information. These timestamps will be reflected in the live post on your site. Your particle headlines and when they were published will be featured as clickable links in a sidebar next to your post.

If you're interested in this new feature, it will likely require a small amount of services hours from us to implement, depending on your requirements for a light setup. Please contact your account manager or support@rebelmouse.com if you're interested in setting this up on your site.


