Amplify every article with videos, user-generated content, and more
At RebelMouse, we believe that flat media is dead. The concept of what qualifies as content is constantly evolving. That's why we want to arm our creators with the right editorial tools to make sure every article is full of relevant, dynamic content.
One of the primary features of our Entry Editor is the Add Media Bar , which makes it easy to embed media into your content from your device or popular third-party sources, including Unsplash, Google Images, and GIPHY. Here's how it works.
When creating a draft in Entry Editor, use the ⨁ icon that appears to the left of the content body to add media to your post.

From there, you can upload or insert media a few different ways.
Upload Images
Use the camera icon to upload images from your device locally through the Add Media Bar. Supported image formats include JPG, JPEG, PNG, and GIF.
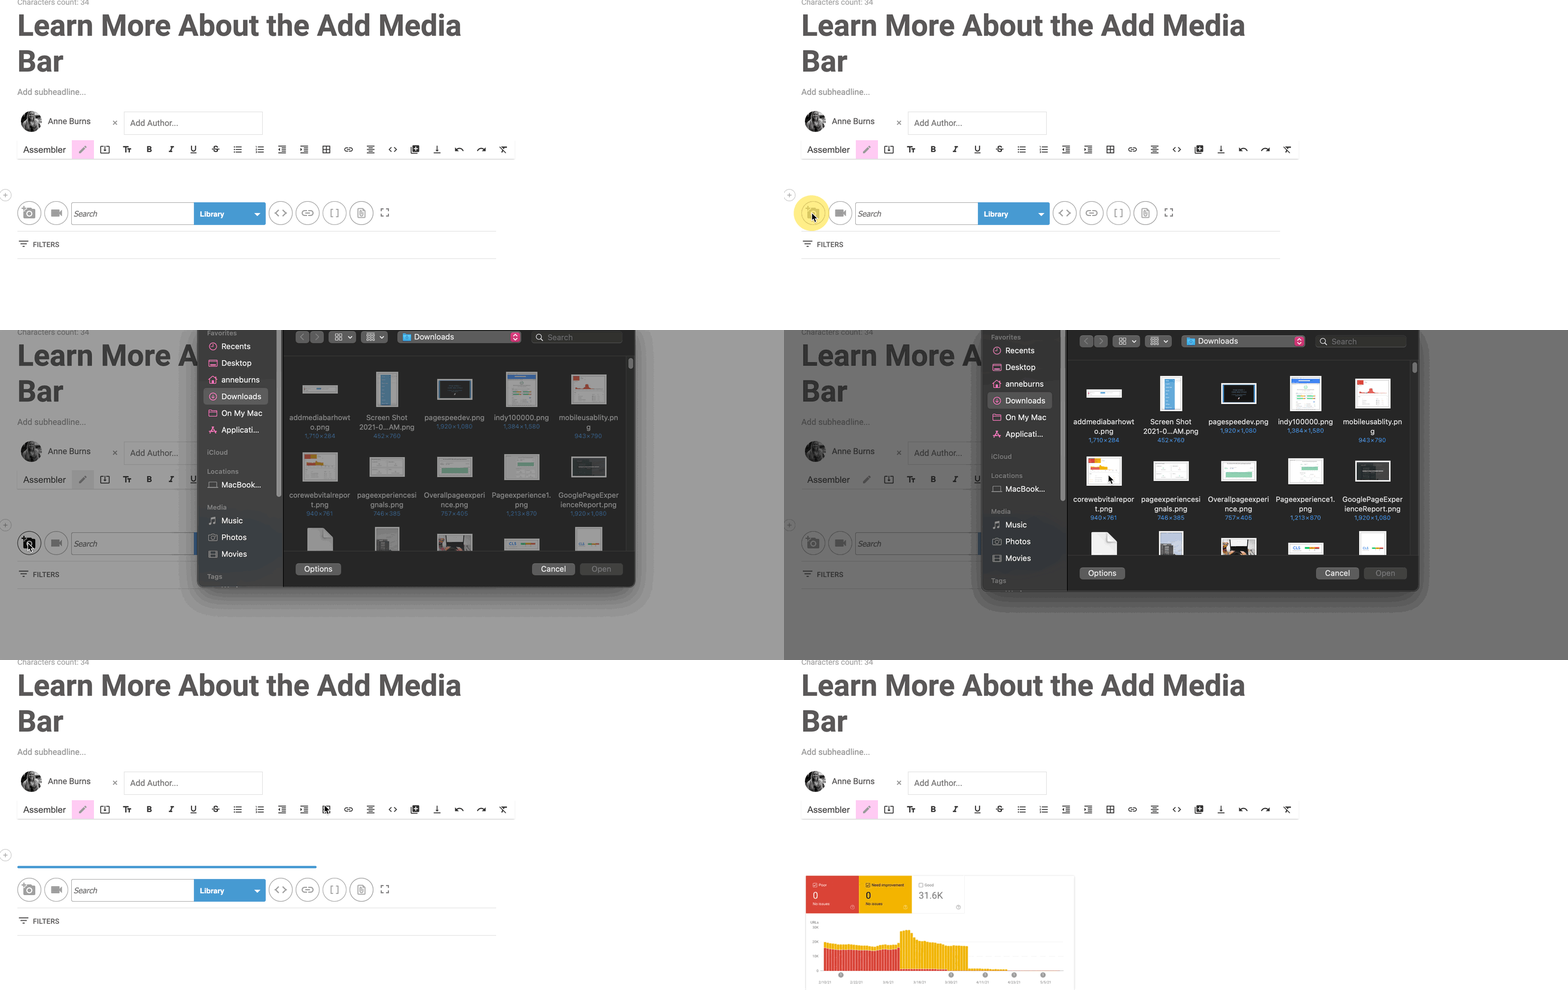
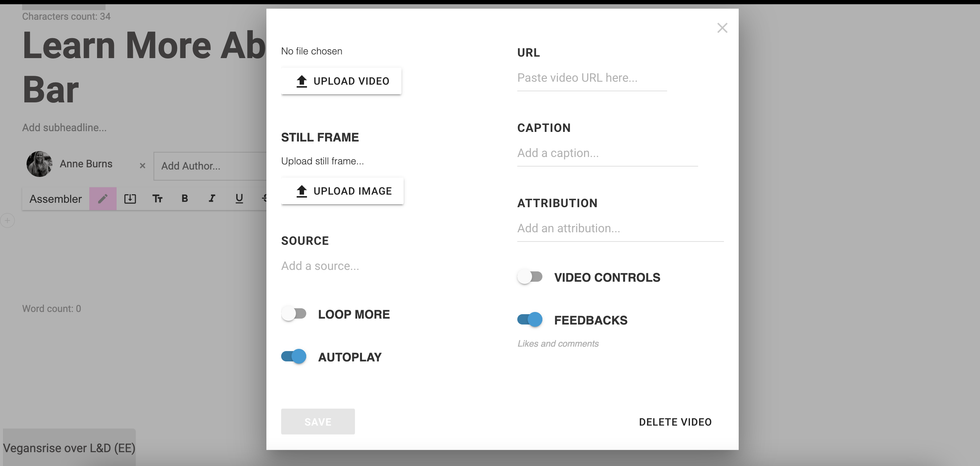
Similarly, the video camera icon will prompt you to upload a video file from your device into the body of the article. Once clicked, you will see a menu pop up to upload your video. From there, you can configure related options, including a still frame, caption, and more.
To the right of the video camera icon is a search bar with a drop-down menu. This menu will allow you to search for media using several different third-party sources:
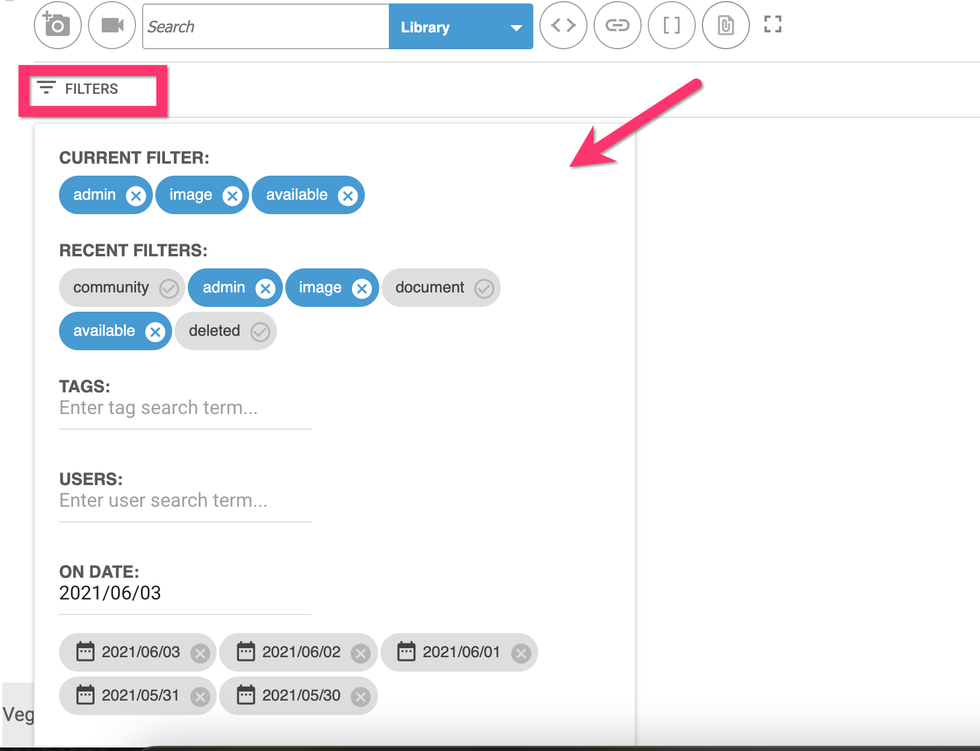
Library: Search for content in your RebelMouse-powered digital asset manager.
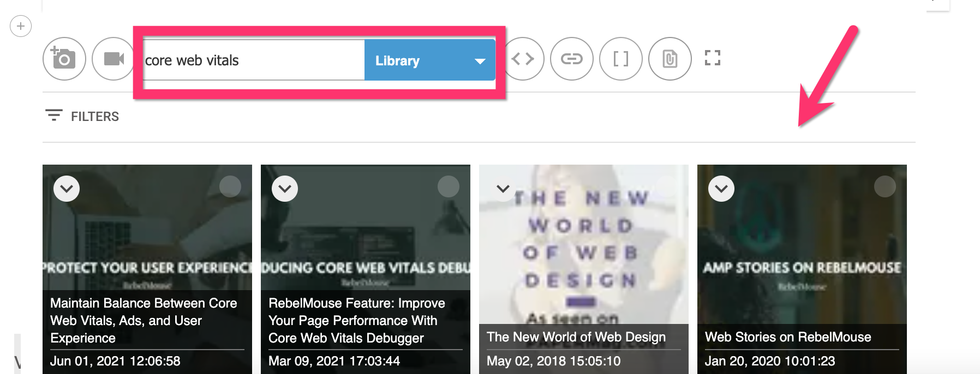
Click the Filters option to left and underneath the search box to filter your Library by tags, users, and dates (please note that we cannot change the default filters in the add media bar).
Unsplash: Use our Unsplash integration to search through thousands of royalty-free photographs.
Google Images: Perform an image search using Google directly from the Add Media Bar.
YouTube: Search through YouTube videos for relevant media to add directly to your article's body.
GIPHY: Search for GIFs to add character to your content.
Amazon: Our Amazon integration allows you to showcase Amazon products in your posts.
Posts: Search for previously published posts on your site to add to your current article with help from our Particle Assembler.
JW Player: If you're using our JW Player integration , you can search for videos directly from the Add Media Bar.
Related Posts: You can add a Related Posts section to the bottom of your post that consists of a selection of existing posts on your site that you choose to surface. Easily search for those articles with this option.
Edit Asset Details From Entry Editor
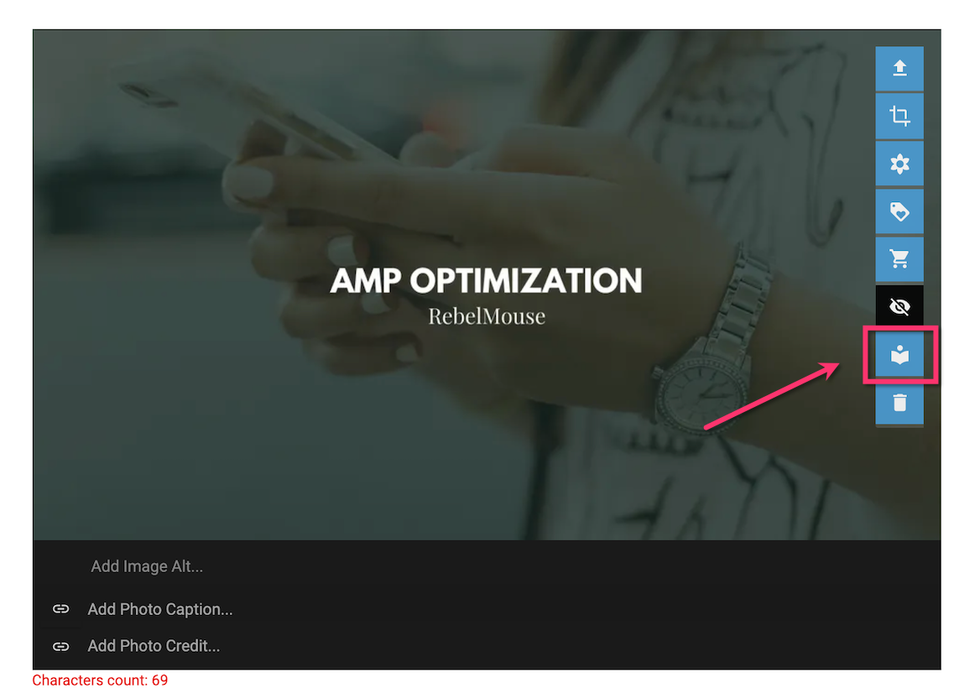
After you have uploaded an image from the Add Media Bar, you can hover over it with your mouse to pull up a navigation menu. The icon with the book will open up a new page to edit the details of your asset.
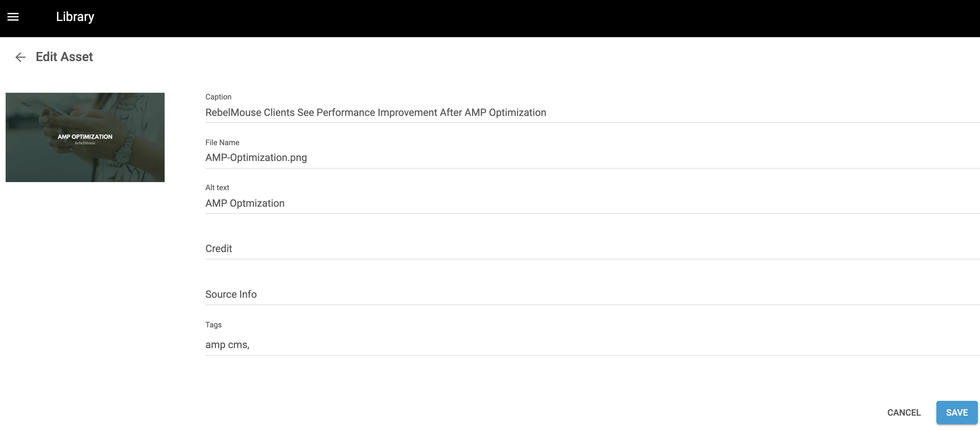
You can edit the image's caption, file name, alt text, credit, source info, and tags. Click the blue Save button once you have completed your desired fields.
Embed Media
Click the < > icon next to the search bar to embed any code snippet into your article:

Once clicked, you will see a box appear that allows you to paste in your embed code. RebelMouse accepts shortcodes to embed content into posts, and uses simple parameters to format embeds properly and securely:

Upload Media via URL
Similarly, you can click the link icon to add media from a specific URL.

Paste your URL in the text box that appears and click the arrow to the right to upload the media from the URL.

Note: It's best practice to upload media via a URL instead of through an embed code. Embed codes will not render properly in publishing formats like Facebook Instant Articles and Google's AMP.
Insert a Shortcode
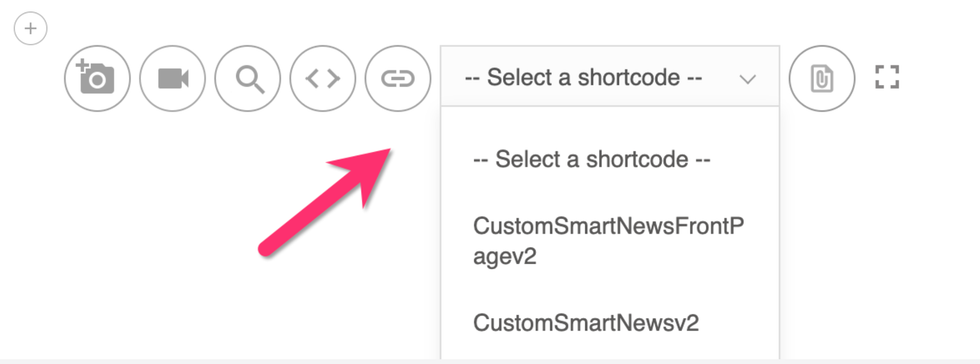
The [ ] icon will prompt you to select and insert a previously created shortcode into your article. Click here to learn more about how to create and manage shortcodes.

Once clicked, you will see a drop-down menu of available shortcodes:
Upload a File
Using the paperclip icon, you can choose to upload Excel, PowerPoint, Word, PDF, and/or CSV files.

Once uploaded, you will see the file's name appear in the body of your post. You can also change the filename in the shortcode if needed.
For example, here's how a PDF appears when uploaded through the Add Media Bar:

To change its name, simply type in the new filename in between the quotation marks that follow original_filename= . Be sure to keep the file's extension (".pdf," in this example) the same.
In the example below, the filename has been changed to "My Report."

Below is a screenshot that shows how both instances — original and edited — look when published.

It's important to note that this particular feature is not supported on AMP.
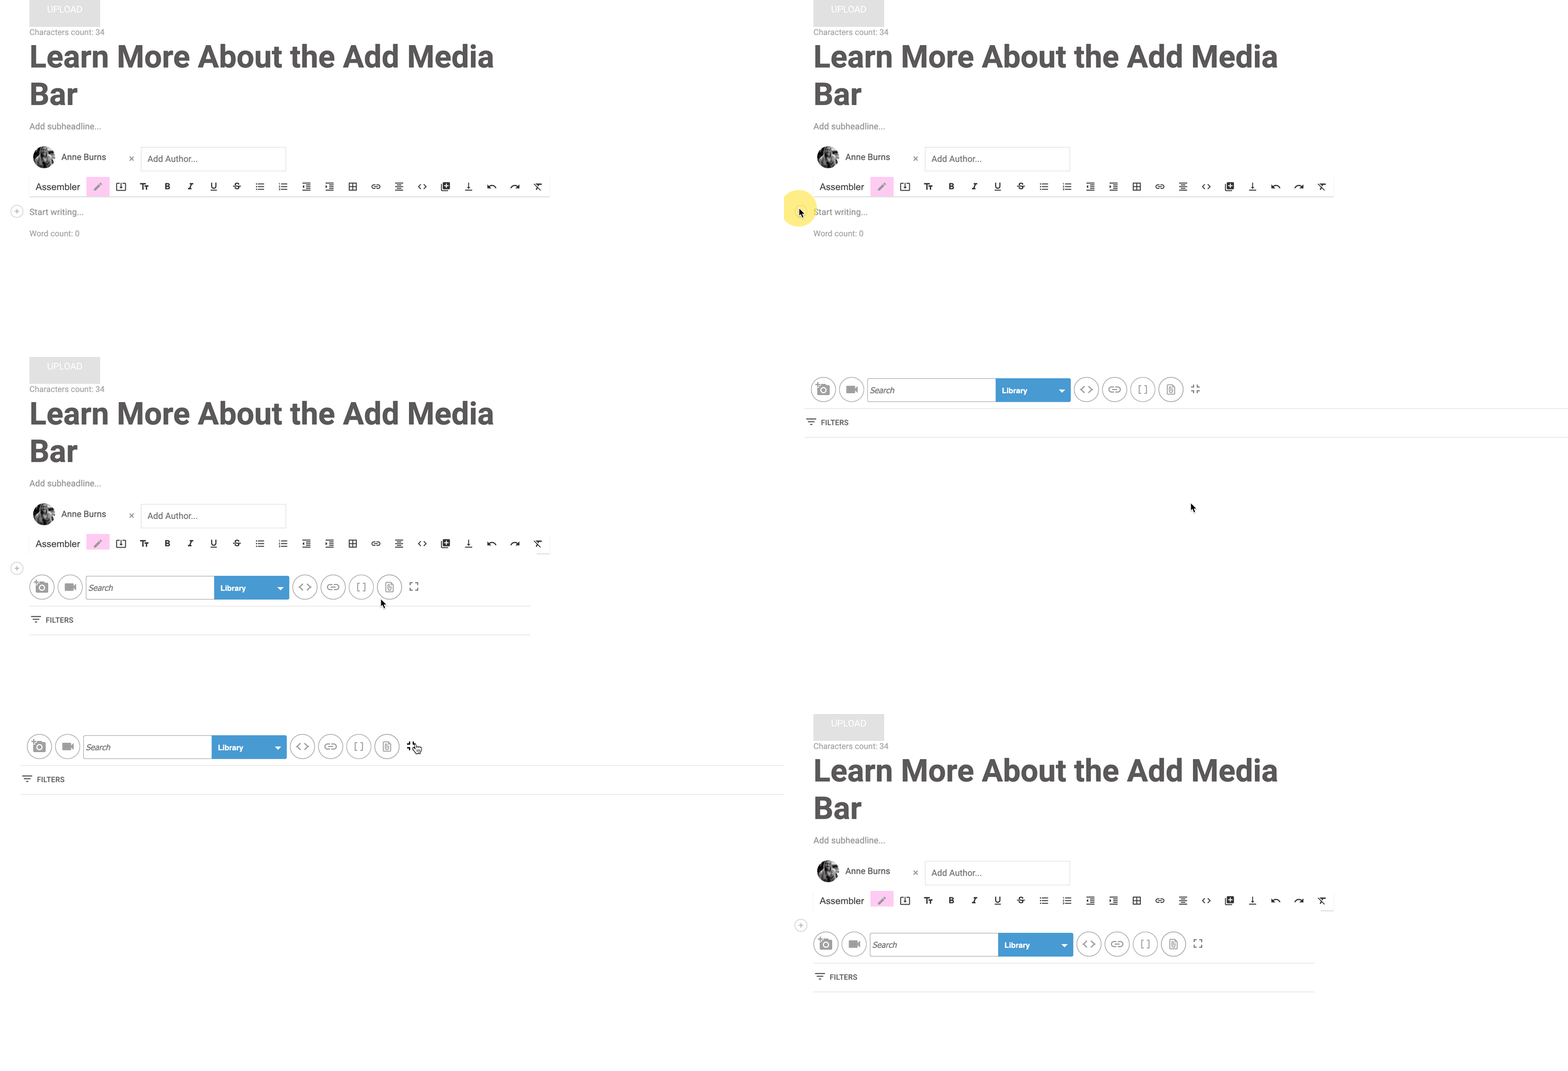
Enter Full-Screen Mode
The four brackets icon will expand the Add Media Bar into full-screen mode. You can click the same icon to collapse the Add Media Bar back to its original size.
Learn More About the Add Media Bar
If you have any questions about how to use the Add Media Bar, or how to make the most of its features, email support@rebelmouse.com or talk to your account manager today. Not on RebelMouse yet? Request a proposal today to get started.


