On RebelMouse, you can assign badges to certain posts and authors. Some sites in our network use them to flag their promoted content, others just like to have a cool way to categorize their content.
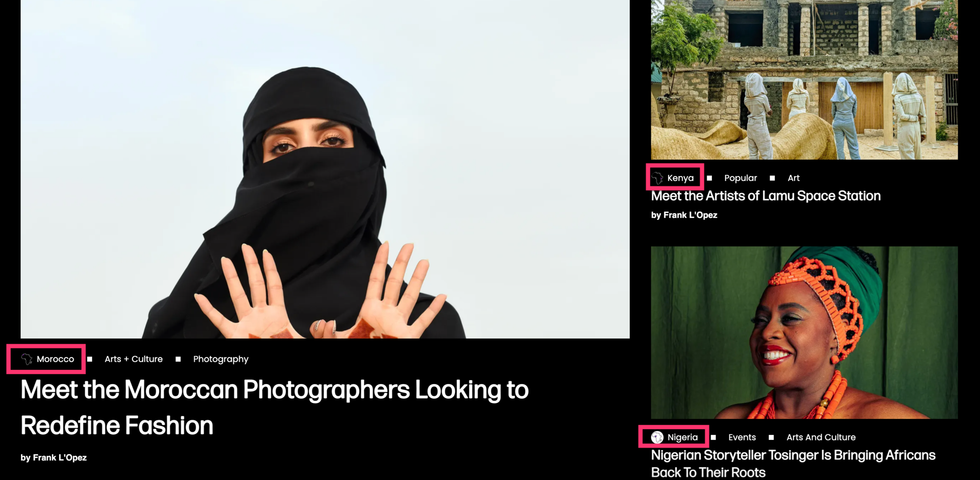
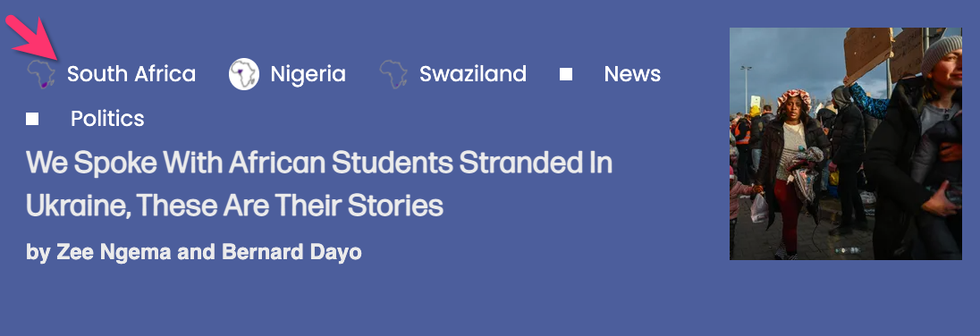
Here's an example of post badges on RebelMouse-powered OkayAfrica . They use our badges feature to label which country in Africa an article pertains to:
To set up badges for your site, append the following address to your site's URL:
/r/dashboard/badges
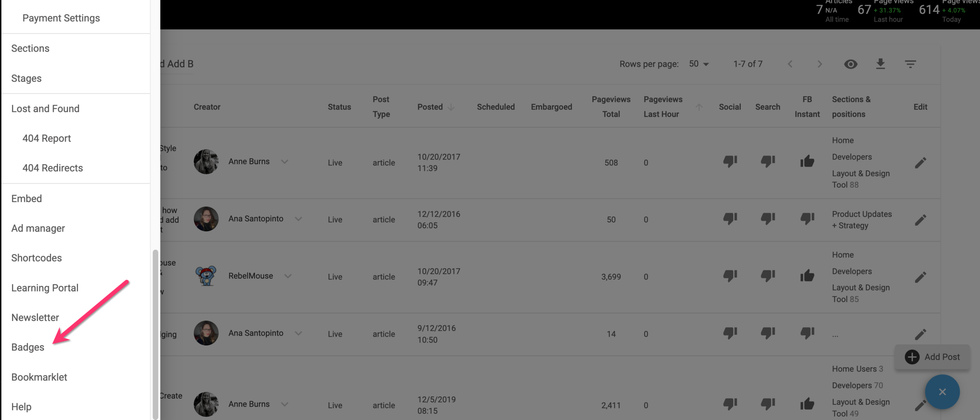
You can also use the hamburger menu (☰) in the top-left corner of your Posts Dashboard, and then scroll down to select Badges .
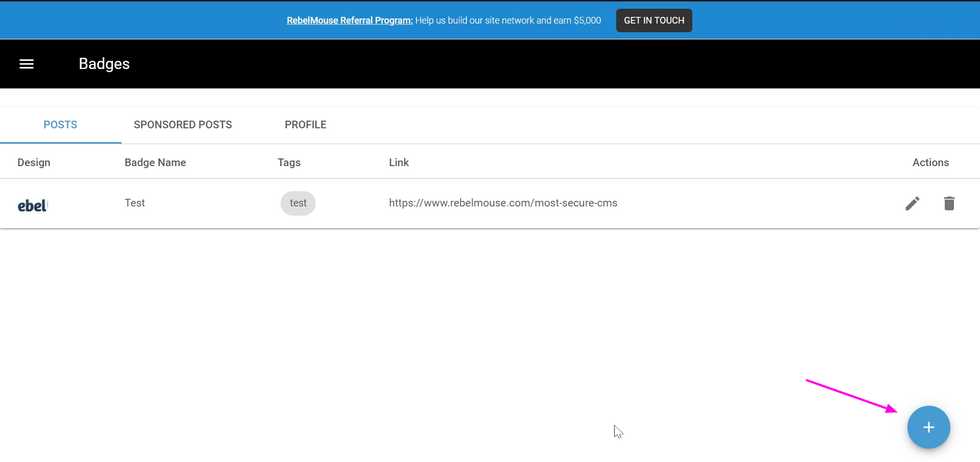
To create a badge, click the +Add Badge button at the bottom of the dashboard.
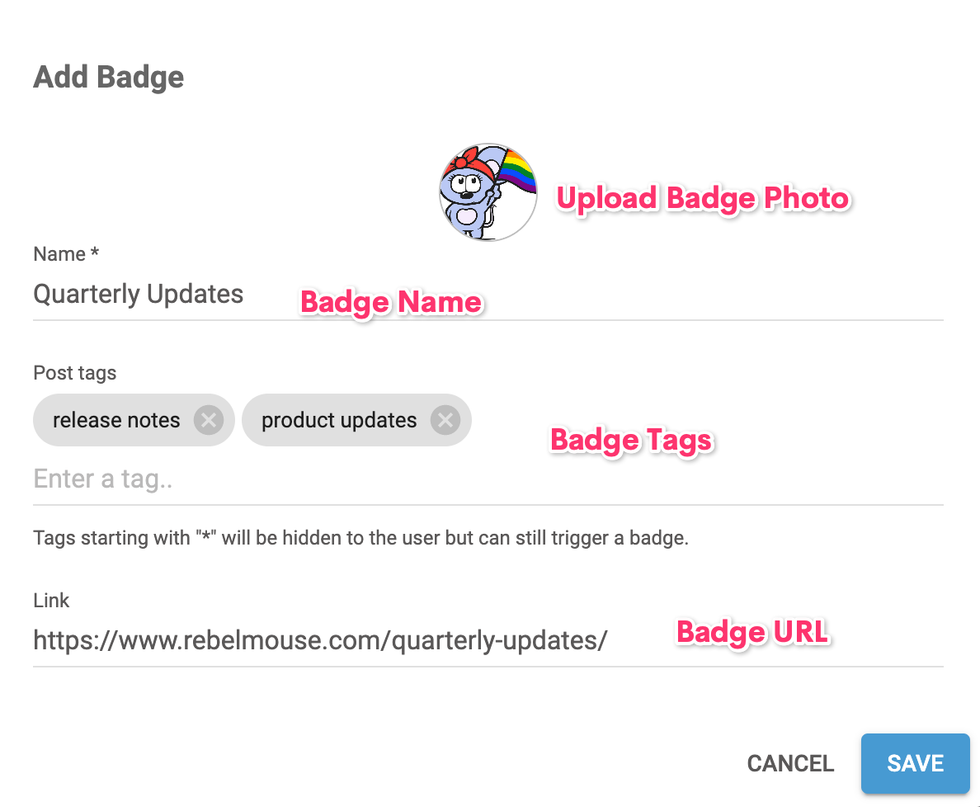
Then, you will need to click the camera icon to upload a badge photo. In the same interface, you can assign the badge a name, post tags, and a URL you would like the badge to link out to. When assigning a badge's post tags, think of the tags you often use to categorize content, such as "trending" or "quarterly update."
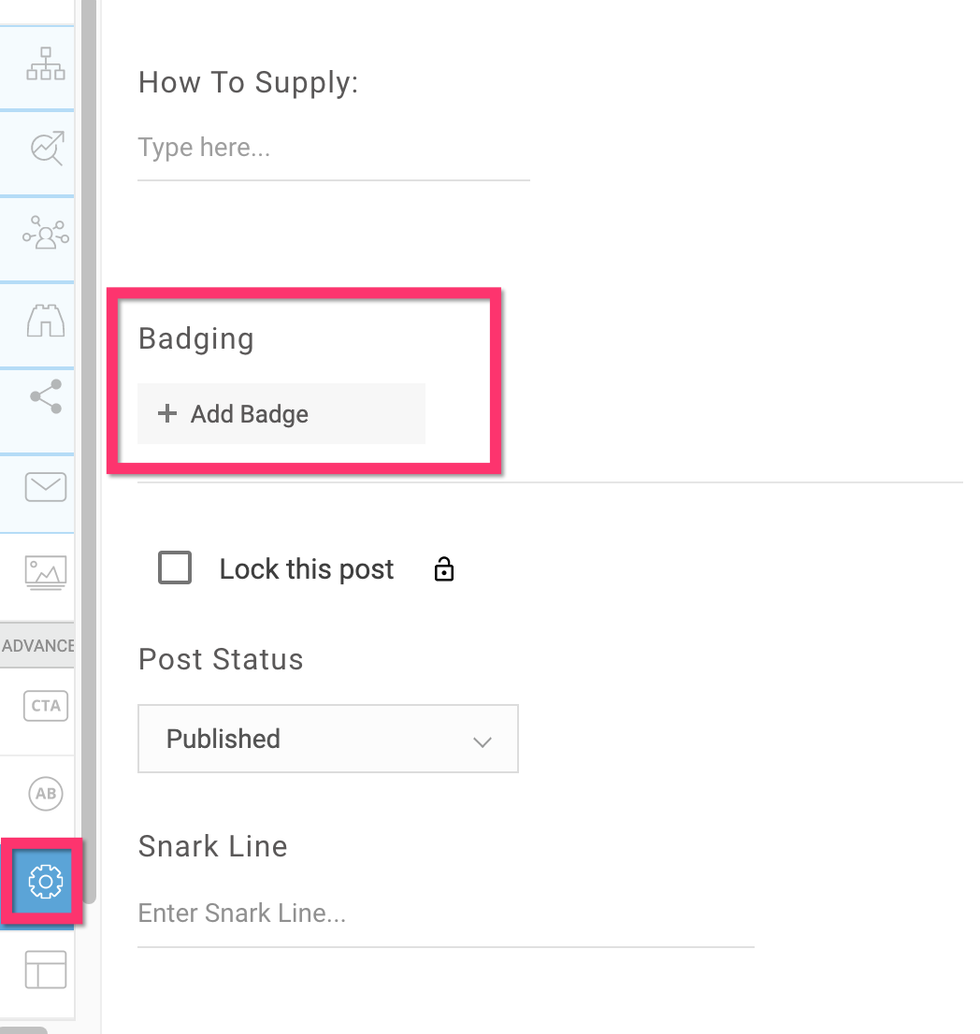
For badges to appear, you'll have to assign them to posts in Entry Editor during their creation. If you haven't been doing this, no fear — you can edit older posts to add them after the fact. You can assign badges via the Advanced tab in the right-hand navigation menu of Entry Editor. Look for the gear icon and then locate the Badging field.
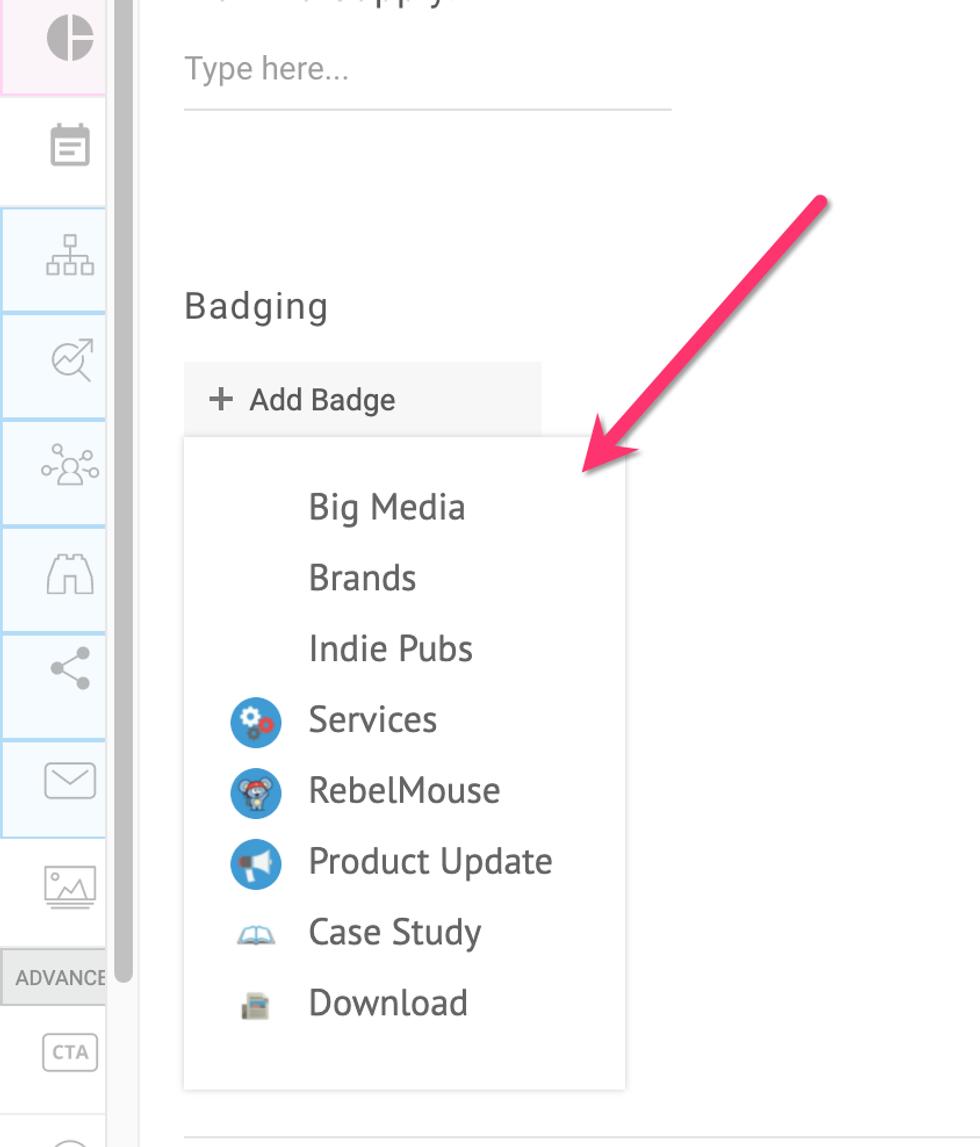
Click +Add Badge to assign a badge to the post. From there, you will see a drop-down menu of your saved badges. Select your desired badge to assign it to the post.
The first badge you select will be the post's primary badge. This will appear first on your home page. You can also assign more than one badge to a post. In the example below, OkayAfrica chose South Africa as the primary badge for their post since it shows up first. Nigeria and Swaziland are additional badges on the same post.
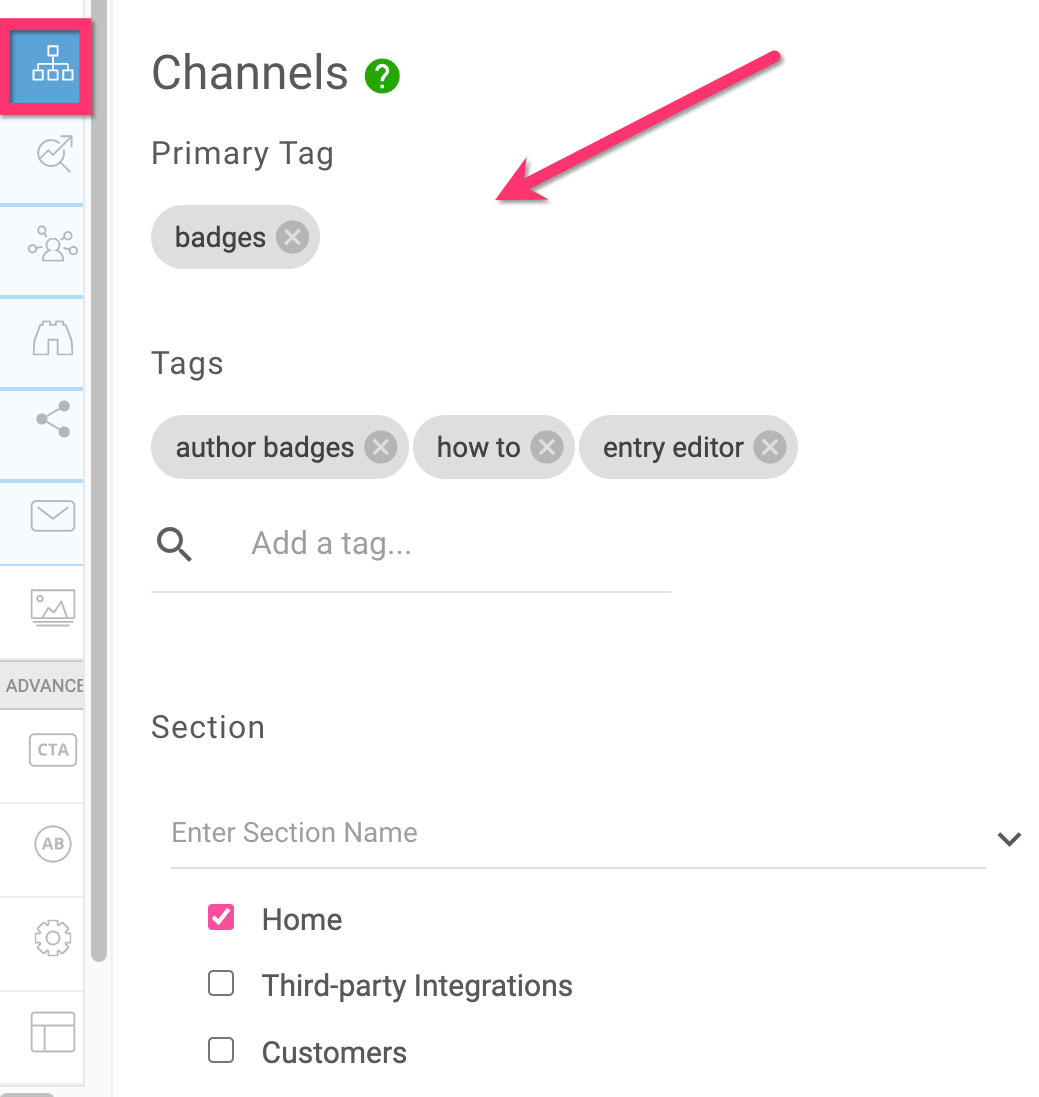
You can also add a badge to a post by adding the same tag that is associated with the badge in the Badges Dashboard. As a reminder, you can add tags via the Channels tab in the right-hand navigation menu of Entry Editor:
If you'd like to make any changes to your Badges in the dashboard, please take note that the posts already containing these badges will have to be updated to see the new changes.
You can also customize how your badges look in Layout & Design Tool . First, make sure your layout is set to be displayed in the Element Order in the settings of the Lead Media element of your Post page layout:

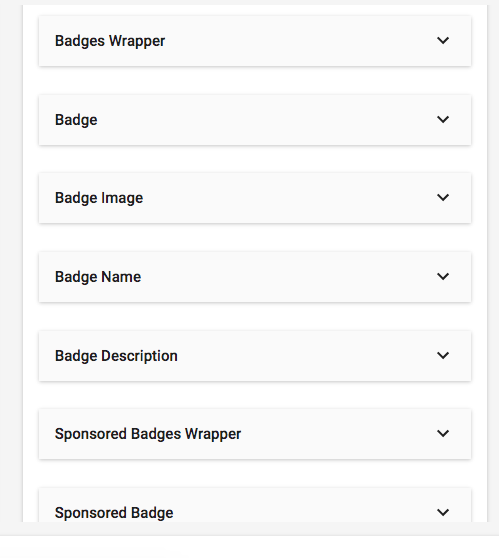
You can add CSS per element to badges as well. To do so, click on the Styles card and scroll down to the badges' sub-elements:
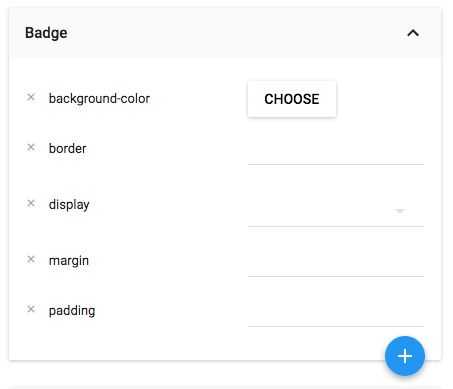
Here's an example of a post displaying a customized badge:
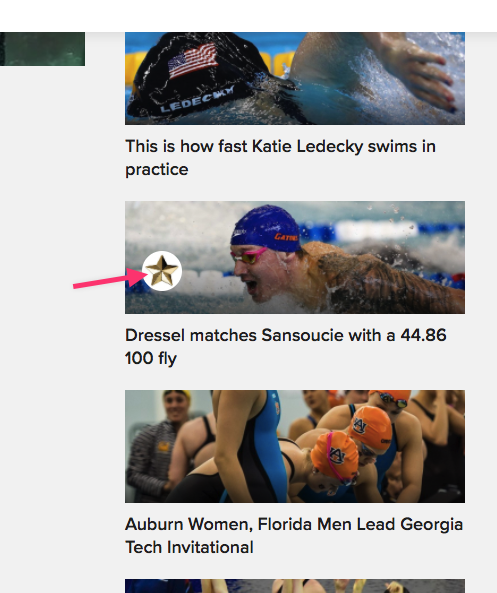
From the Badges Dashboard, you can also create Author Badges, a feature that gives authors on your site a unique image to complement their avatar. For example, if an author tends to write about "Trending" topics, you could assign a "Trending" badge to them. Click here to learn more.
If you have any questions about badges, email support@rebelmouse.com or talk to your account manager today.


