We always love to introduce new features to the RebelMouse platform, and today we're announcing a Stacked Sticky element. This will allow you to have two sticky elements at the top of your page, with the option to have one of the sticky elements disappear after a select amount of time. This can be very useful for an ad or banner you want to display briefly, and then be able to have the space back.
How Does It Look?
It's entirely up to how you want it to look, but here's an example screencast where we have an ad for our new book at the top, followed by a breaking news banner right beneath. You can see that as the page scrolls down, the behavior is set to have the ad removed after a couple of seconds of scrolling, and that it will reappear as the page scrolls back to the top:
How Do I Set It Up?
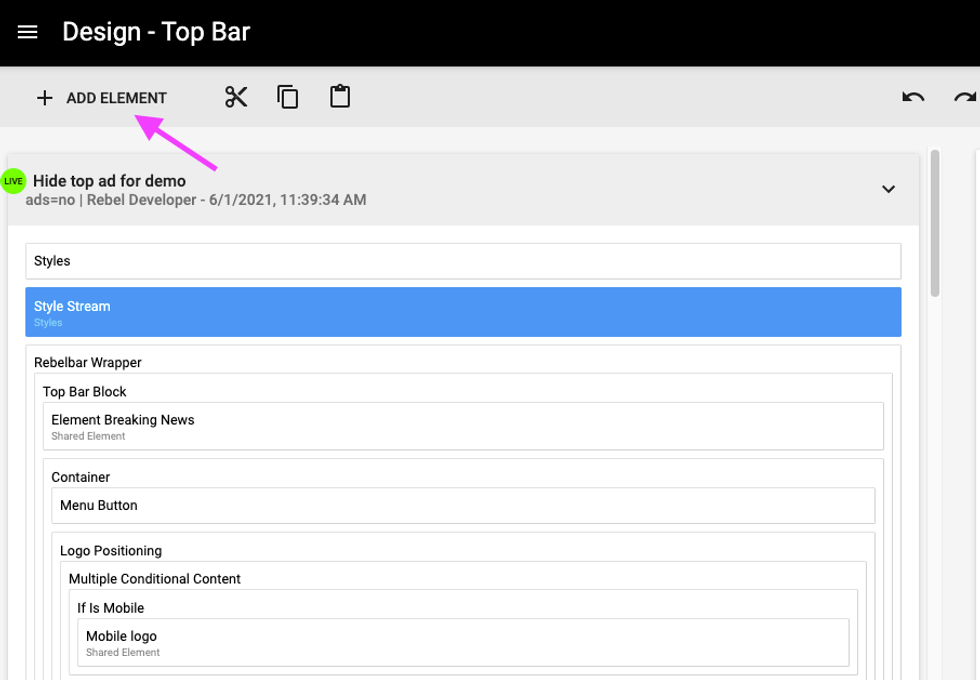
First, you will need to navigate to the Layout & Design Tool in the hamburger menu (☰). For this example, we'll be placing our Stacked Sticky in the Top Bar.
Once you're in the Top Bar interface (or wherever you decide to place the Stacked Sticky, simply click the + Add Element button to open up a list of available elements:
Next, scroll down to near the bottom of the list, and select Stacked Sticky :
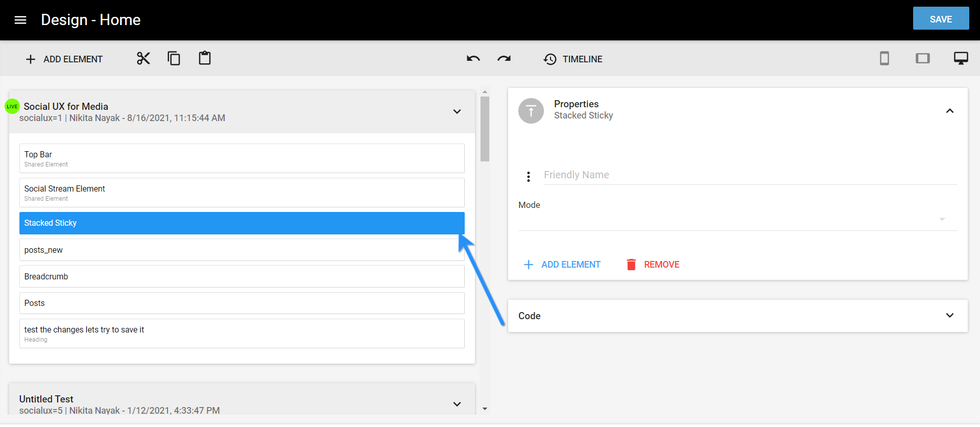
Clicking this will add a Stacked Sticky element to your Top Bar, but it won't be doing anything yet. Note that in general, when you add a new element, it will be placed at the bottom of the page in the Layout & Design Tool, you will want to simply scroll down, find it, and then click and hold, and drag it to the top.
Once you have the element where you want it to be, you can click on it to open the Properties card. Here you'll see options for a Friendly Name and a Mode selection. For the mode, you can select Always Pinned or Pinned After Scroll (defined below):
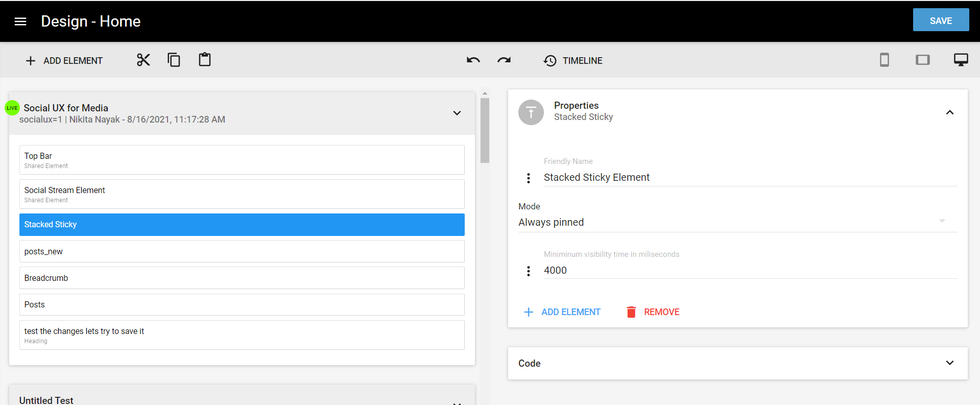
- Always Pinned: You can select a frame of time (e.g., 4,000 ms) for the item before it disappears. As you scroll, the item will disappear after the selected amount of time. If you reverse scroll and return to the top, the item will appear again.
- Pinned After Scroll: The item you want to disappear will be removed on scroll, and only the pinned area is visible after scroll. In this scenario, there is no way to bring back the removed item.
You can see in the following screenshot how we've selected these options for our example:
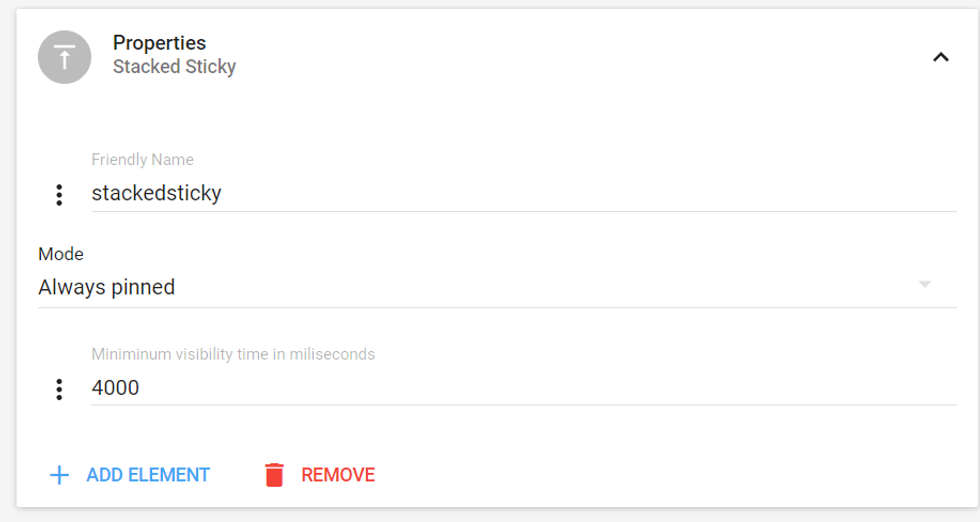
In this example, the item will be shown for four seconds of scroll, and then be removed, as seen in the screencast above.
But we still have a few more steps to make this work as we want. Look back at the last screenshot, at the bottom, and you'll see + ADD ELEMENT . Click that, and you'll be able to start building your Stacked Sticky. You'll then see that you have three options:
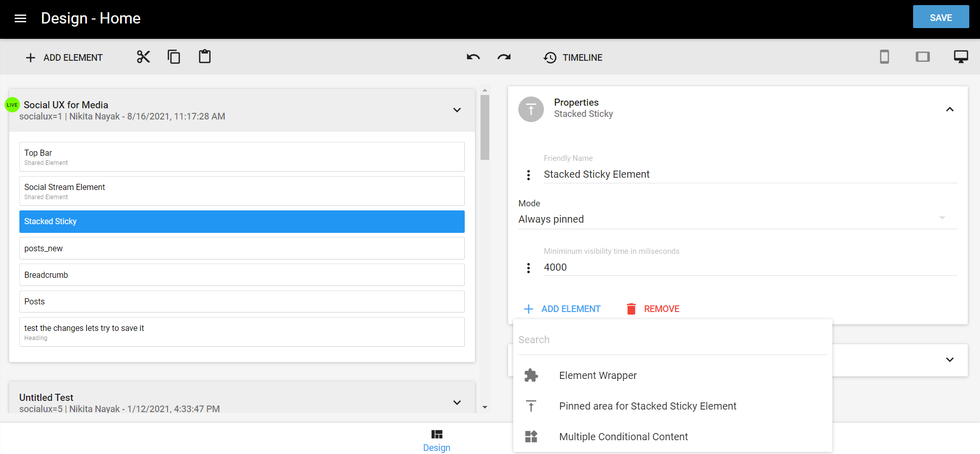
Let's start by selecting Element Wrapper to have a place to build out our Stacked Sticky. You'll see that the wrapper has now been inserted in the Stacked Sticky element, and has an option again for a Friendly Name :
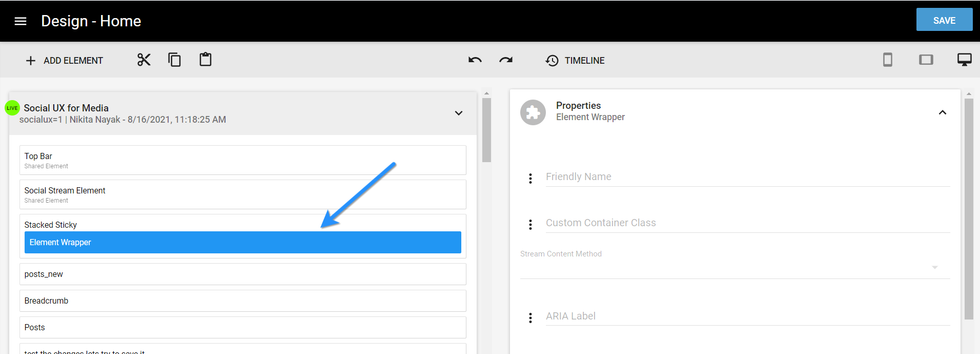
From the right side interface, you'll again see + ADD ELEMENT . Click that, and you'll be given the full list of elements that are available in your RebelMouse platform. For our example, we'll be using shared elements, but you can easily use any element that makes sense.
Our shared elements are simply prebuilt units, that have specific styling, and are set to pull content from specific sections. Here, we're pulling from Element Ad Slot , which will pull our advertisement post. Please note that the shared elements we are using for this example have been specifically created for this demonstration, and are not prebuilt on other sites.
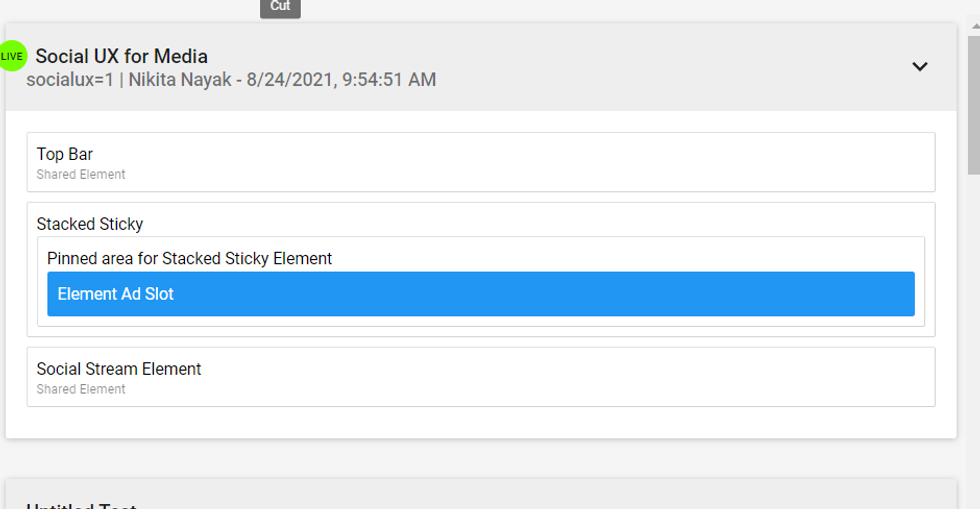
This first element is the one that we will want to disappear after the four seconds assigned.
Our next step is to define the element that we want to stay on our page. For this, we will again select the Stacked Sticky element that we have placed in the left-hand side of the interface, select + ADD ELEMENT , but this time we will select the Pinned Area for Stacked Sticky . This will be the item that we want to stay after the previous item is removed:
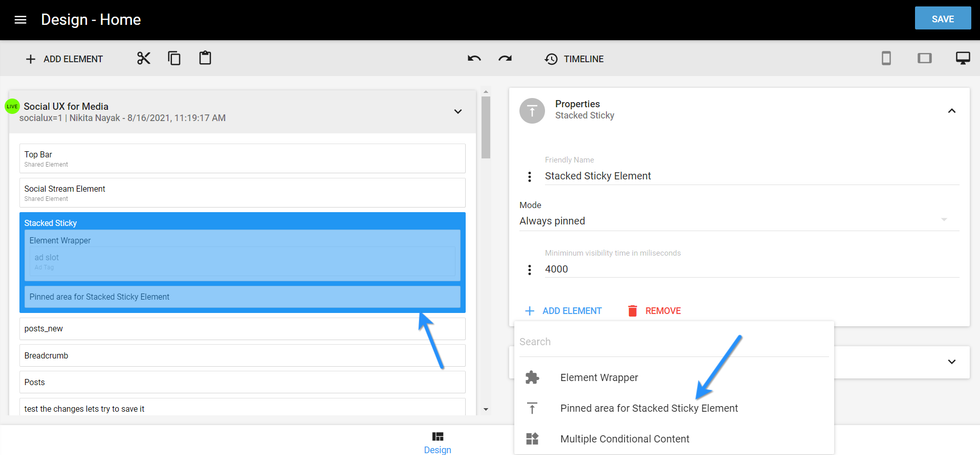
We will now follow the same steps as above to add a wrapper, then a shared element. This time however, we will select our Element Breaking News , as we want our breaking news banner to stay visible, after our ad banner is removed:
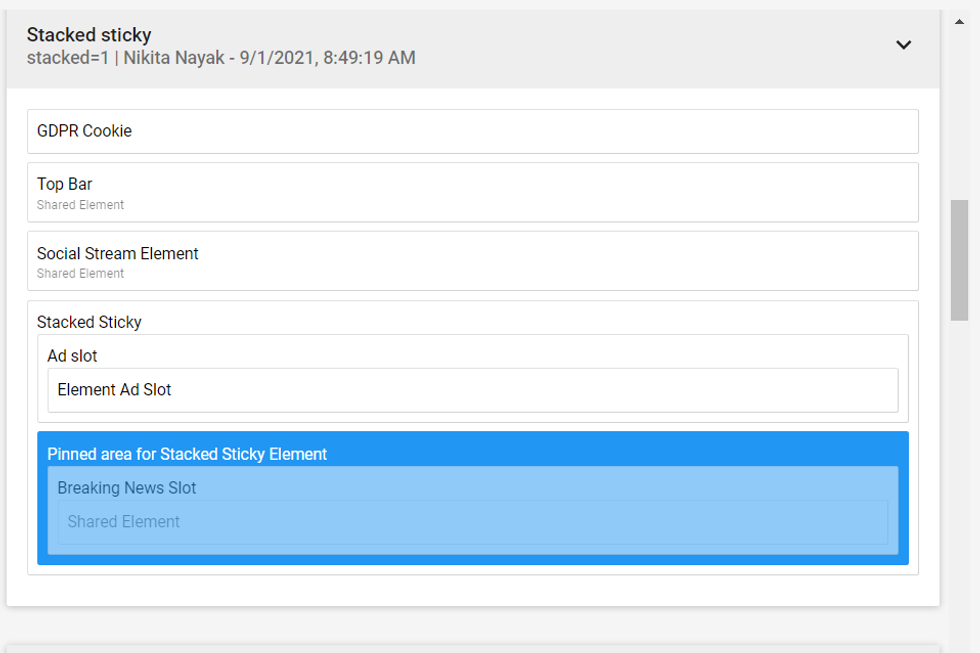
We are now ready to go! We can simply click Save , add a message describing what we updated, and then click Save again. Let's go check out our work (be sure to keep an eye on the red banner at the top!):
Please note, it's always a best practice to make updates using an A/B test while you're working on something like this, so that you don't make a mistake and have it end up on the live page!
If you have any questions about this feature, please contact your account manager or email support@rebelmouse.com .


